
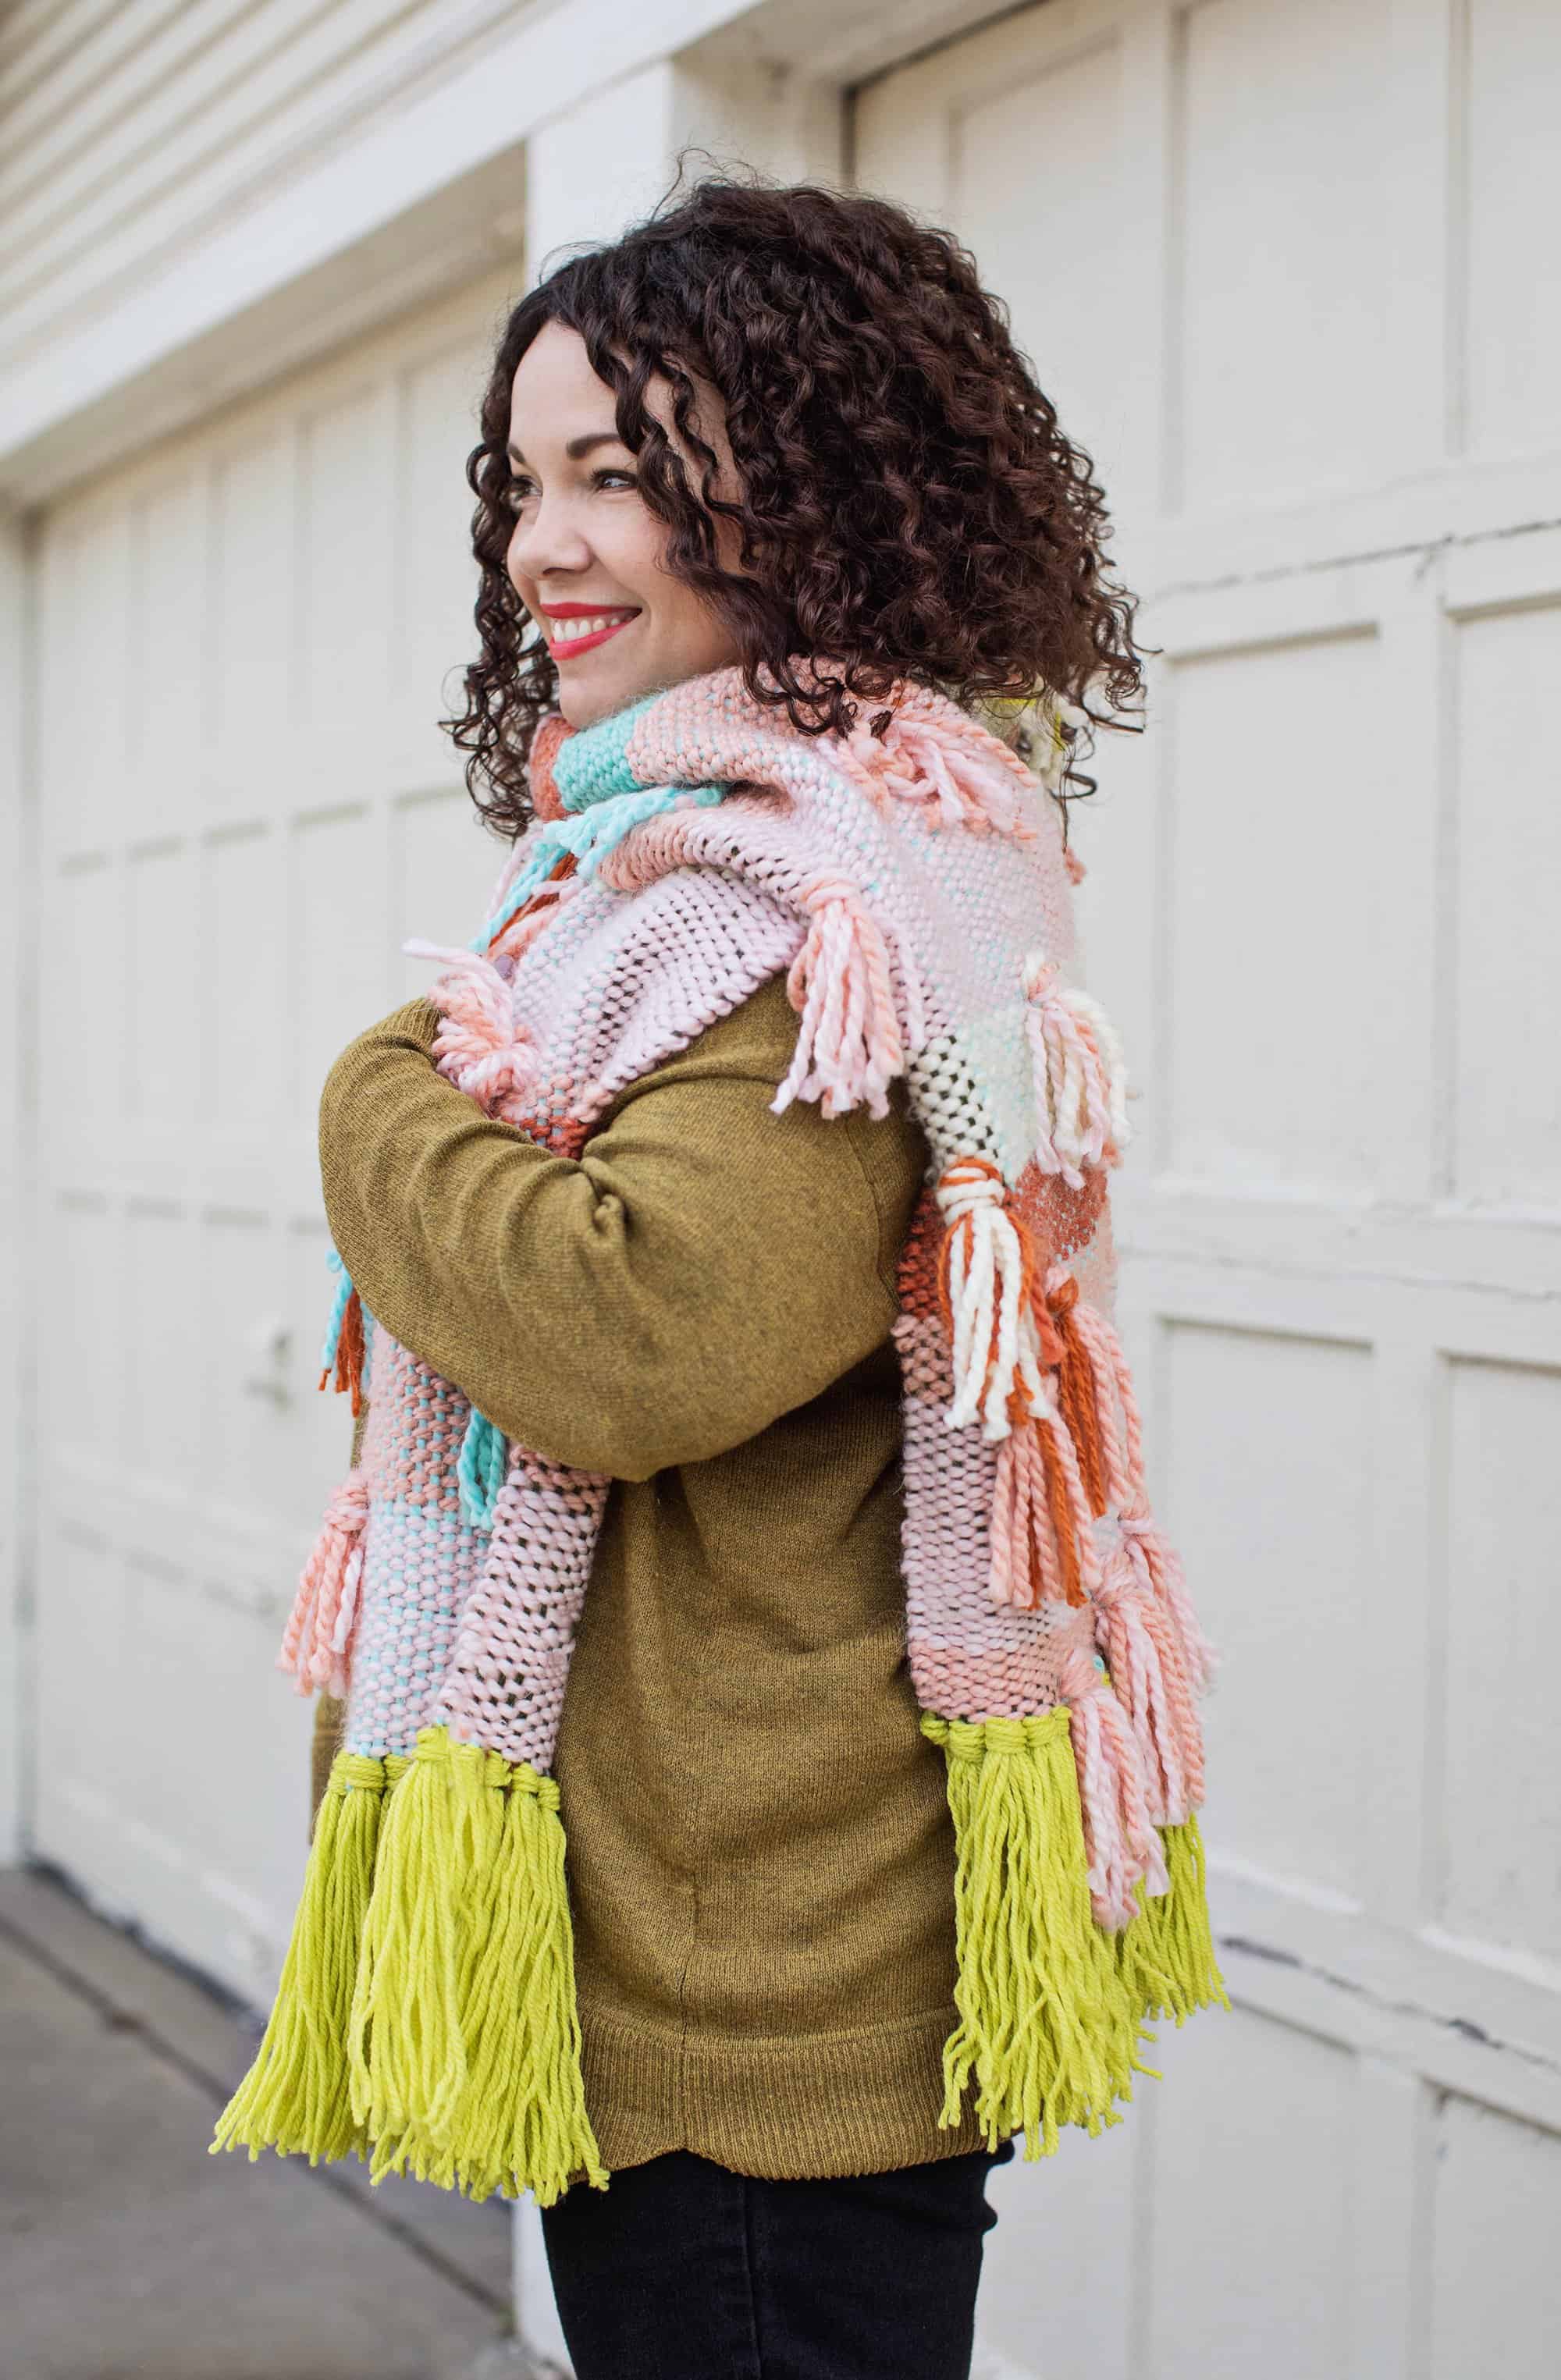
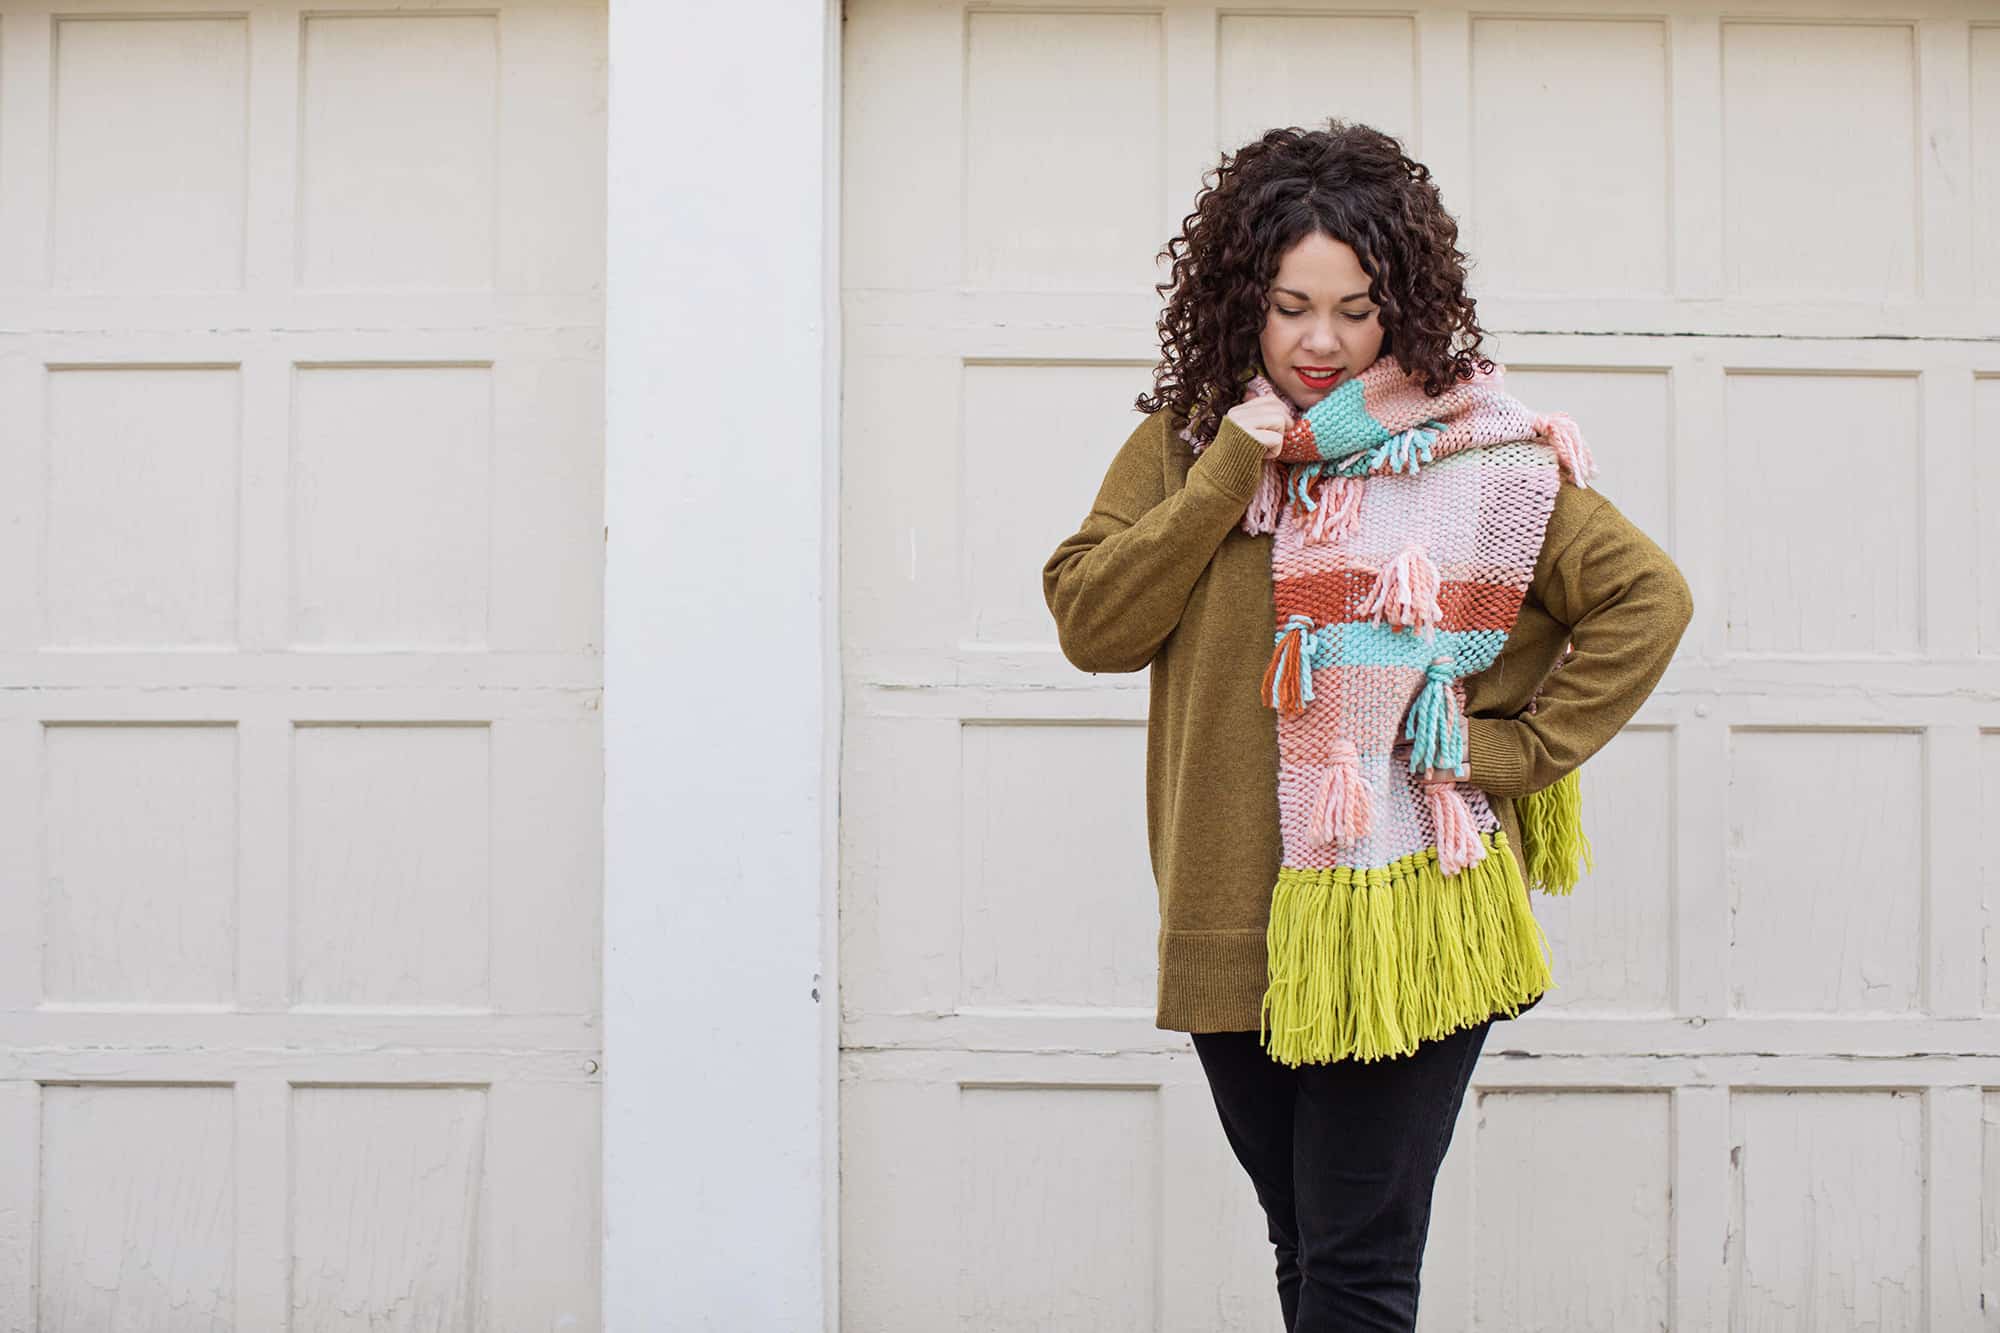
 Donning a large statement scarf during winter is kind of like a socially acceptable version of wearing your coziest blanket out in public, right? With everyone embracing a more ‘hygge’ way of life this season, why not use those weaving skills we’ve been working on to create a wearable accessory that will see you through the rest of winter?!
Start here: Weaving for Beginners
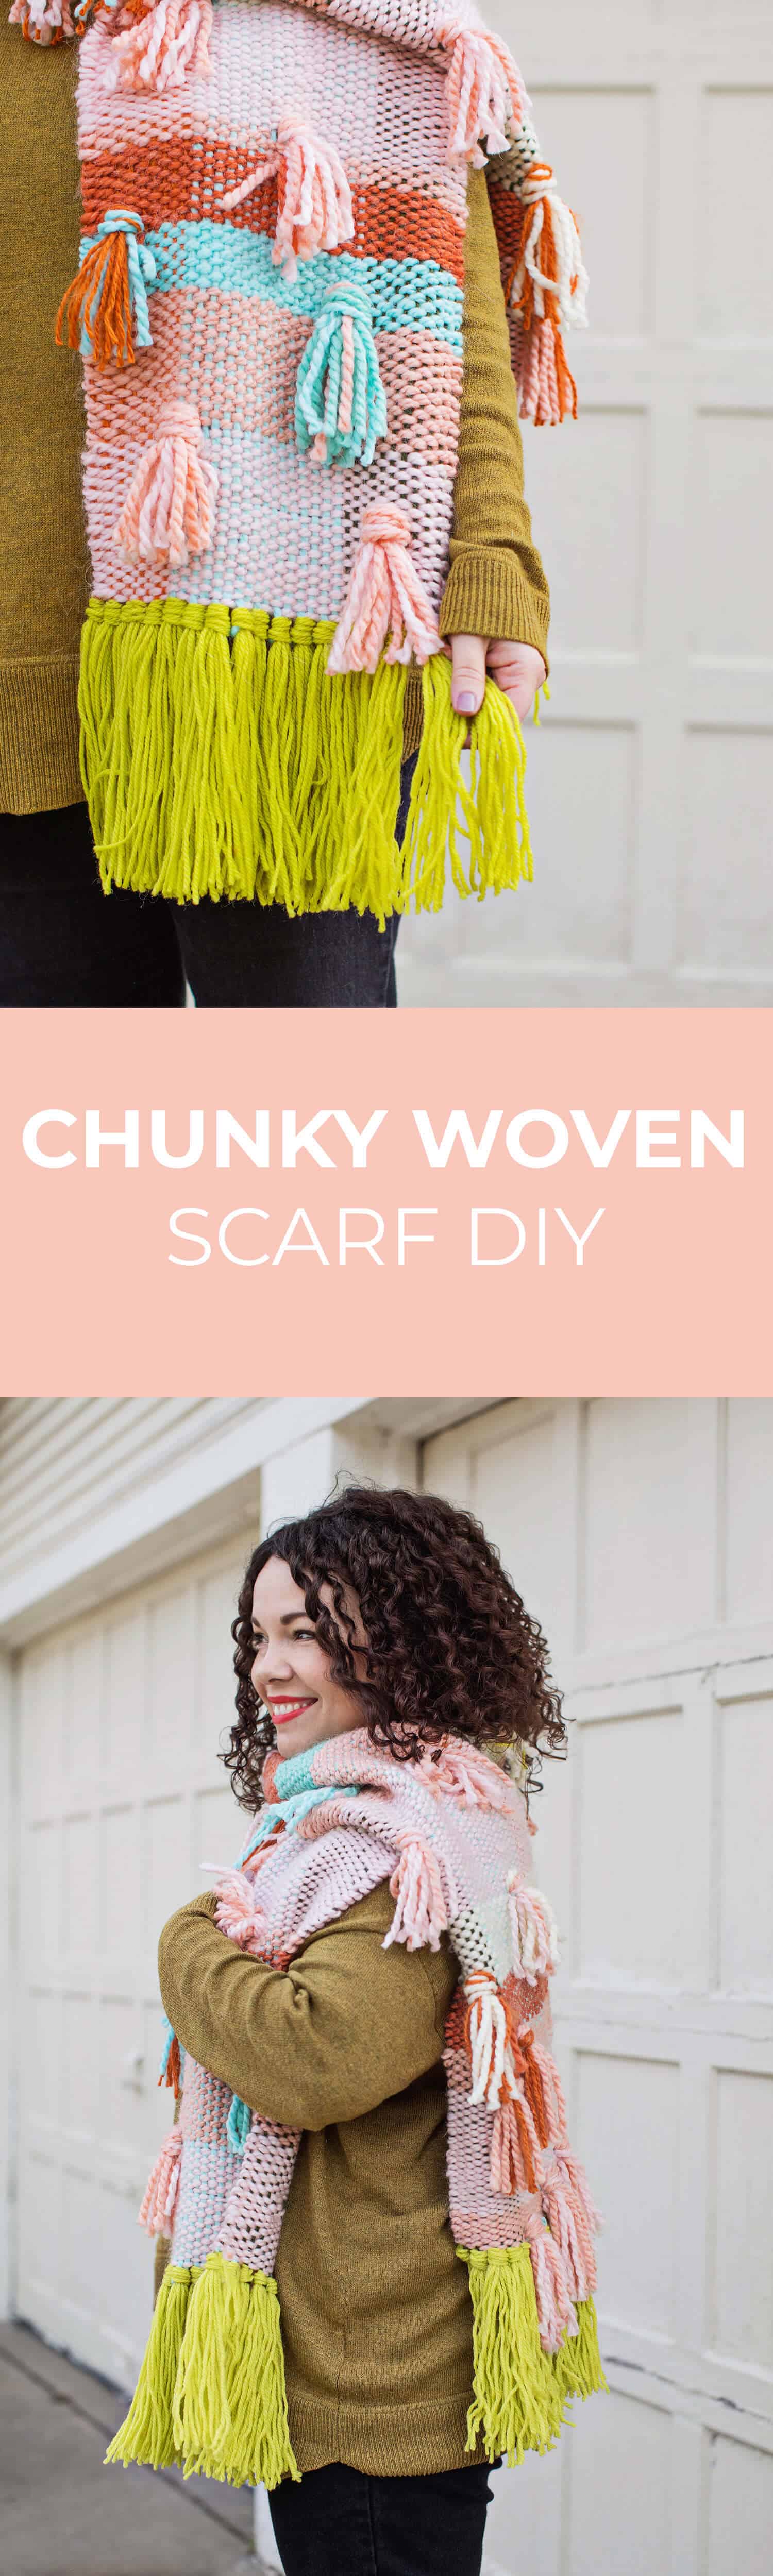
I tested out a few tartan color schemes before landing on a variety of fresh pastels, but this design would work just as well if woven with only neutral fibers. The key is to utilize yarns in similar weights for a smooth, wearable weave that will drape like a dream. Chunky yarns are perfect because they fill space quickly and allow the tartan pattern to show up. Plan your next yarn purchase ASAP because this is the perfect winter evening project!
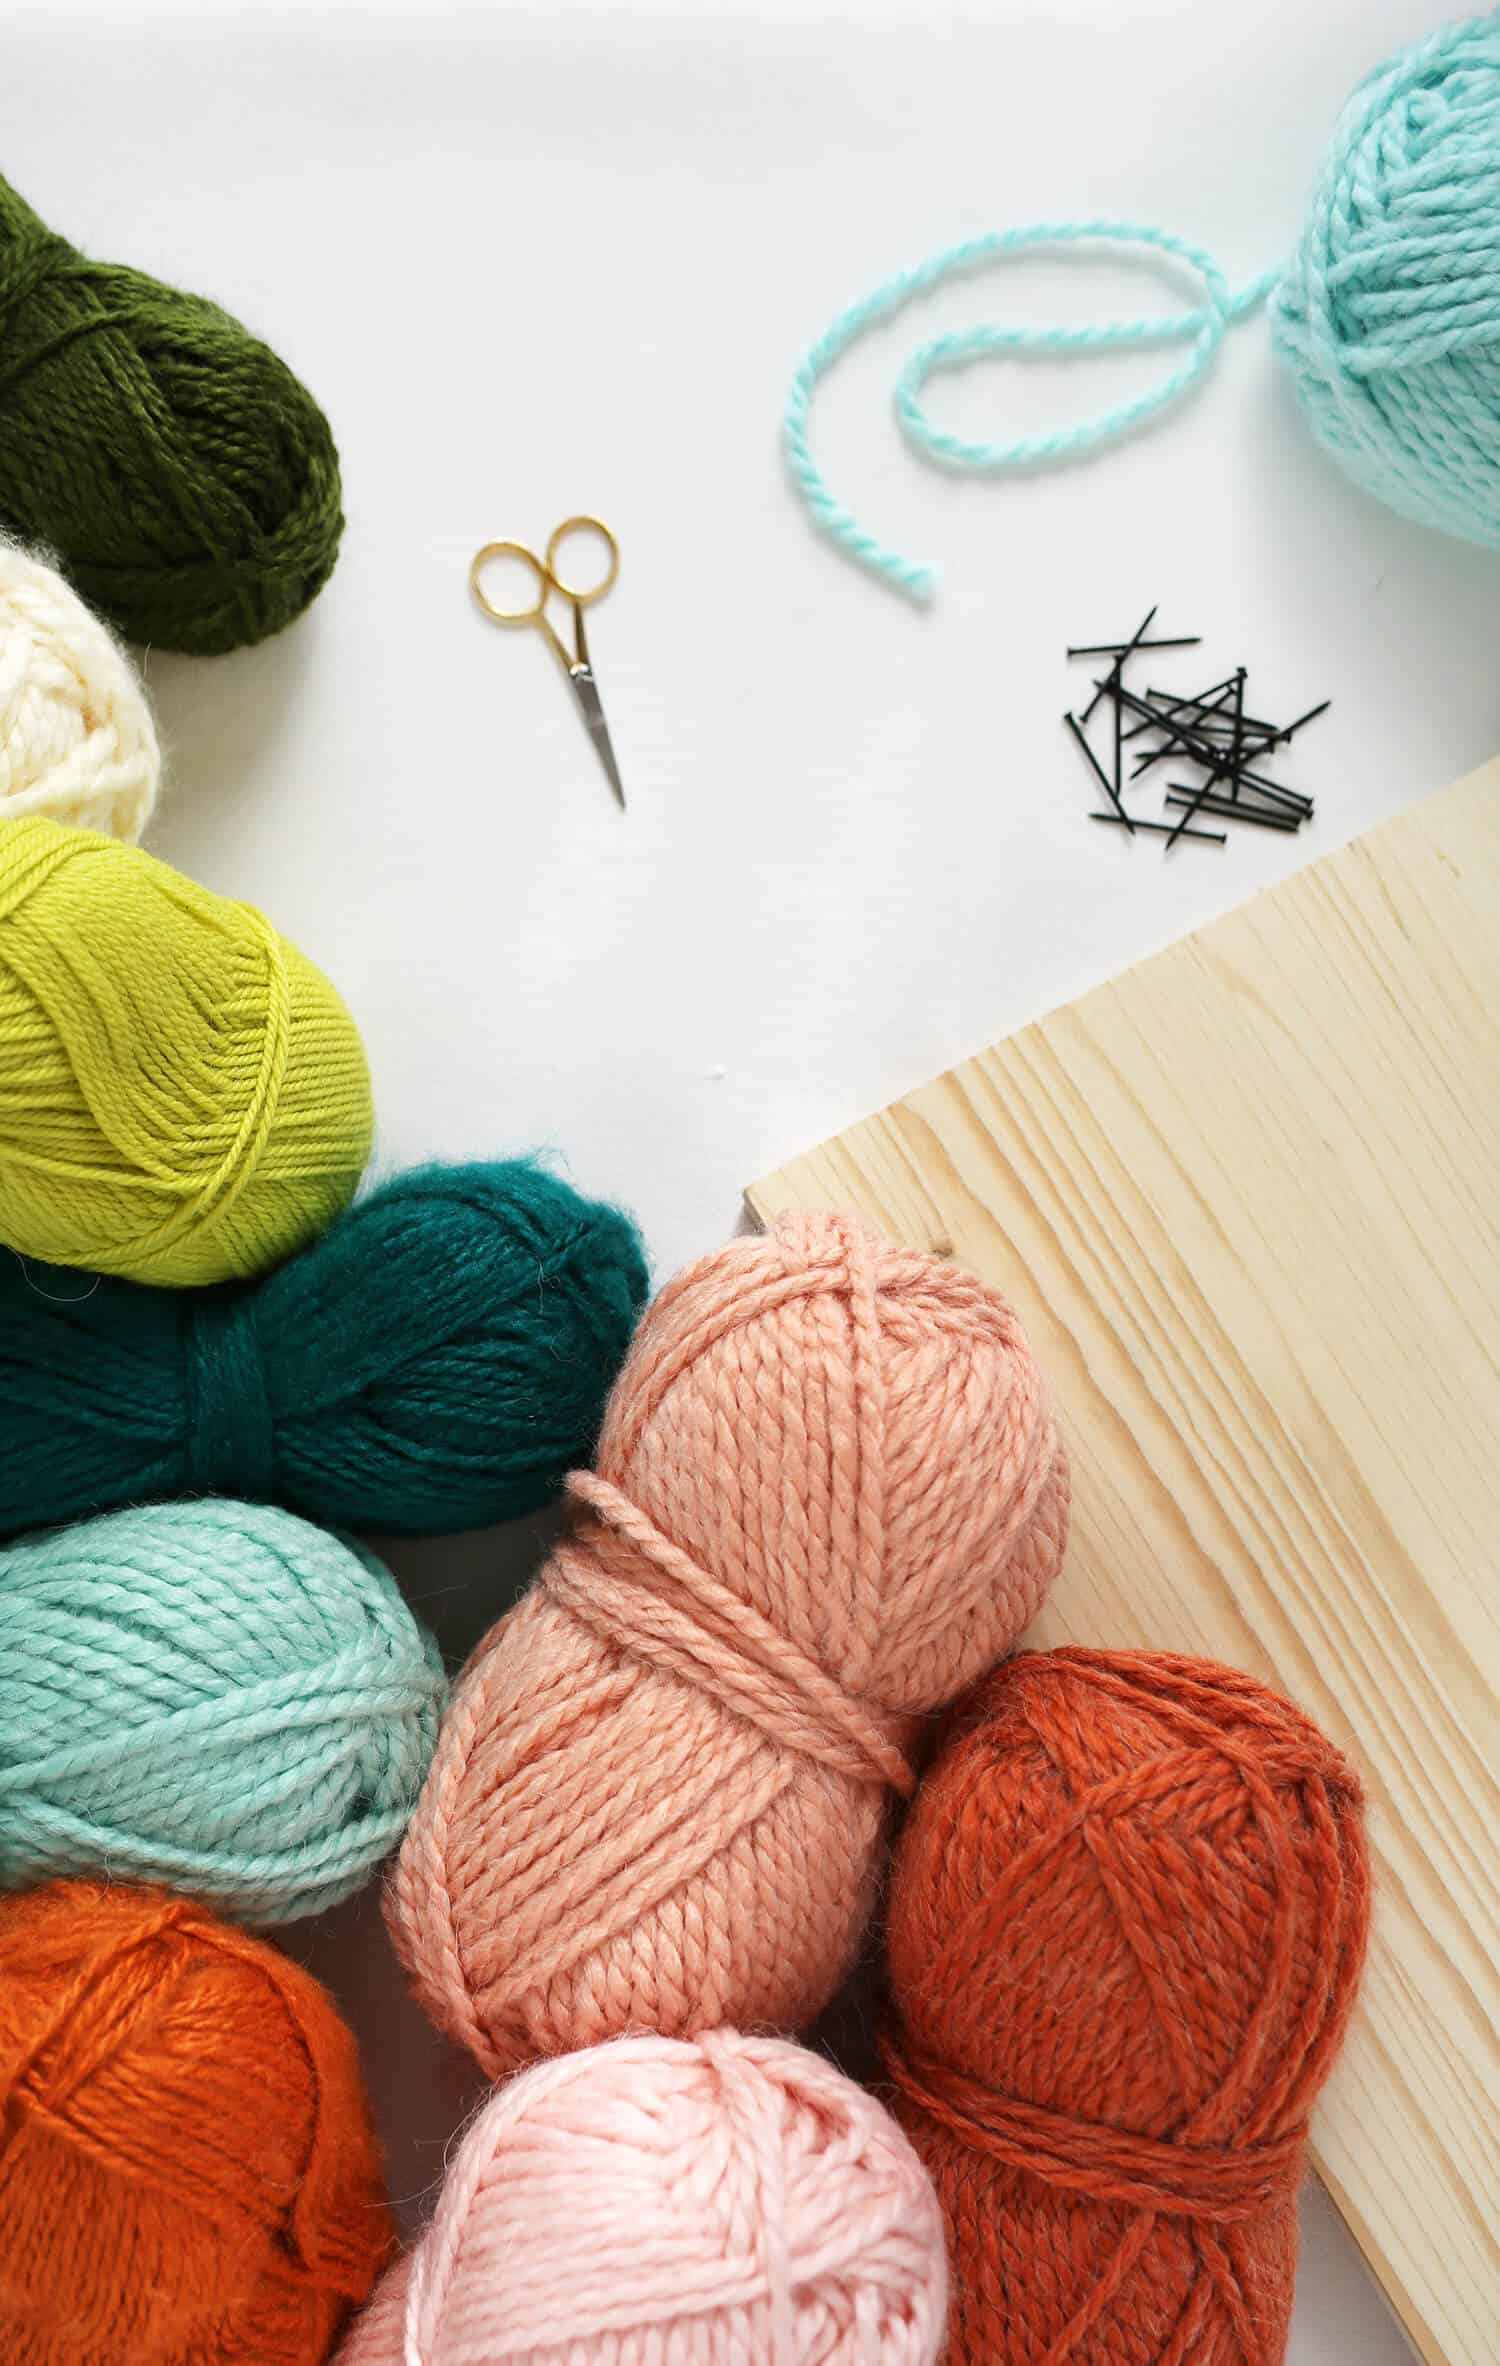 Supplies
-one 1″ x 12″ x 6′ pine board (available pre-cut at large hardware stores)
-40 finishing nails (without wide heads)
-five to seven 100g skeins of chunky weight yarn (you’ll have leftovers)
-one 100 g skein of worsted weight (medium weight) yarn for the fringe on each end
-paint stick or weaving sword
-scissors
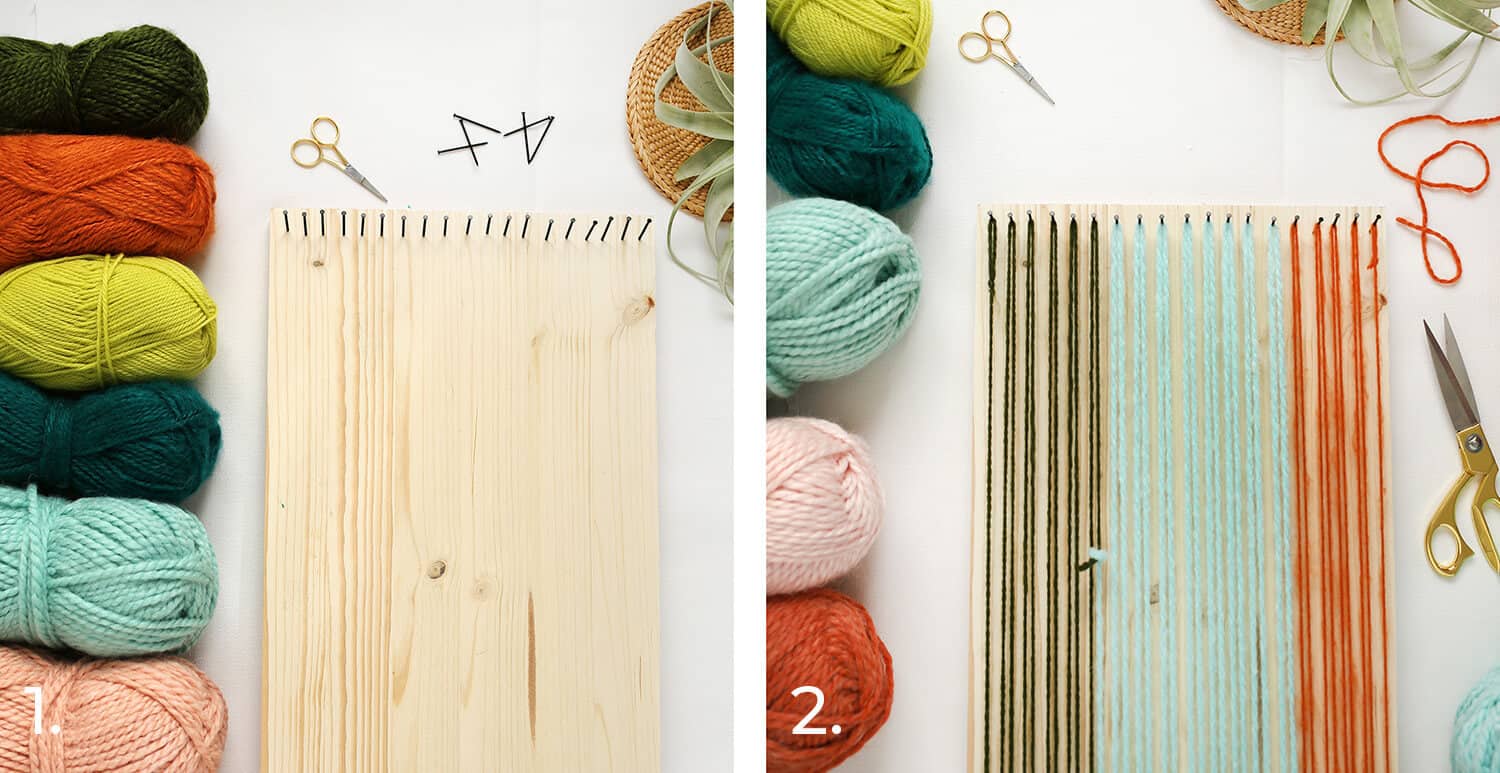 Step One: Nail 19 finishing nails near the top of your board so that they are evenly spaced and about 1/3″ from each other. Repeat with 18 finishing nails on the opposite end of the wood.
Step Two: Choose three contrasting yarn colors for your warp. Tie a loop knot with your first yarn and place it over the first nail on the top left side. Pull it gently down and wrap it around the first nail on the bottom left side and then back up to the second nail on the top left side. Continue warping your loom in this way for as wide as you’d like with that color.
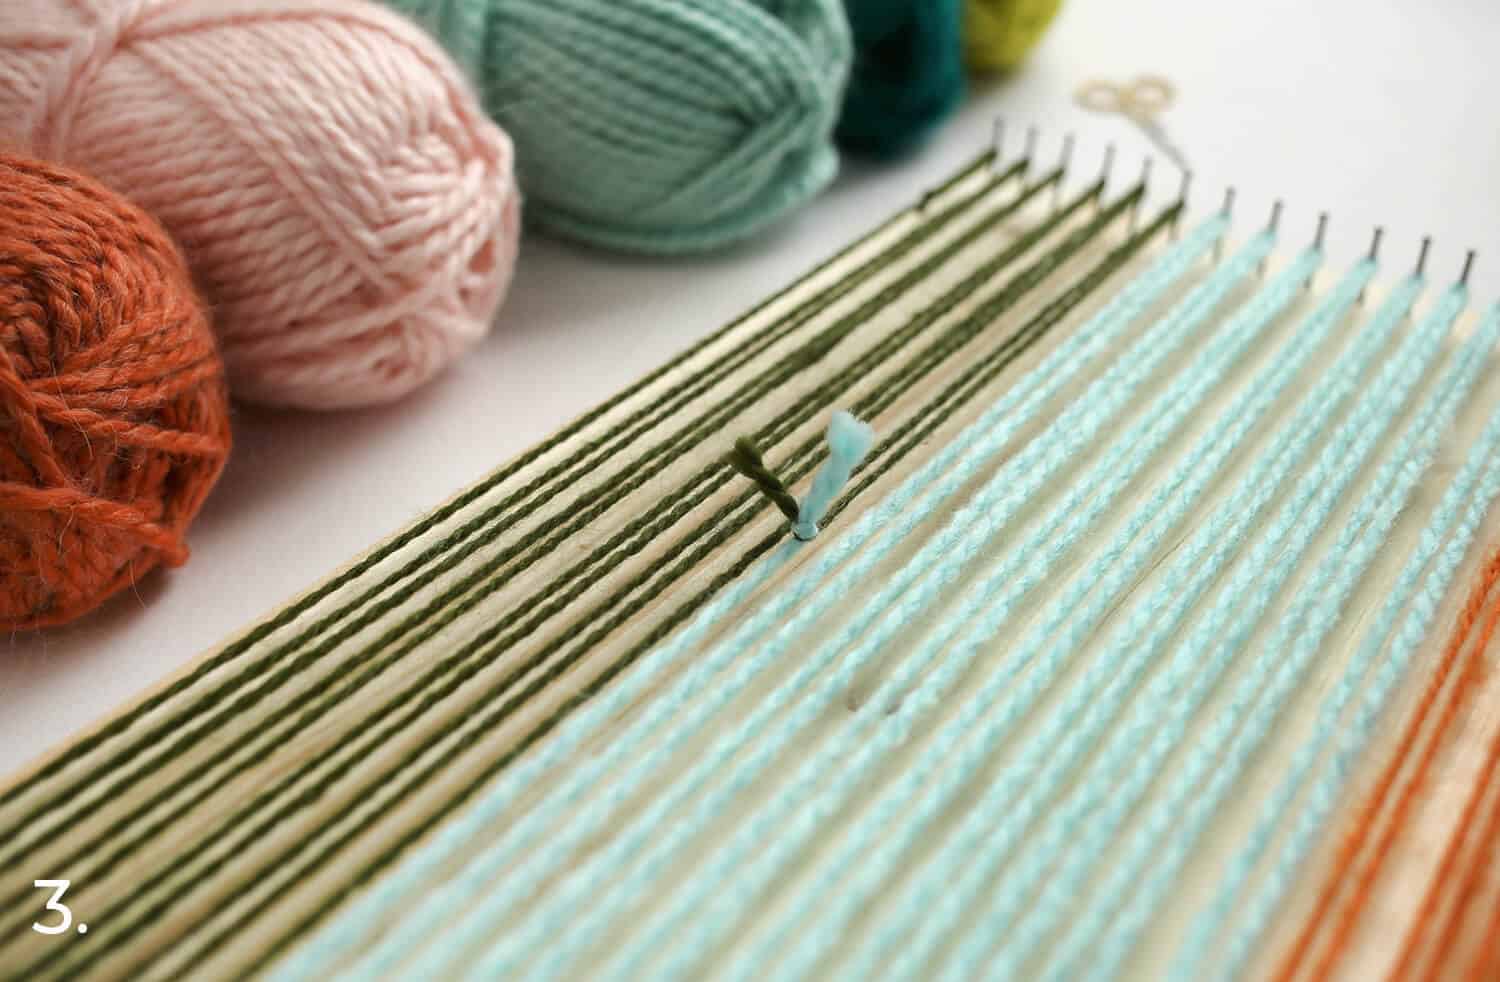 Step Three: Cut the end of your first yarn so that it is about 12″ down from the top row of nails. Tie the end of your second color to the end of your first color in a double-knot. This will get covered up with a tassel later. Repeat this process with your third color of yarn.
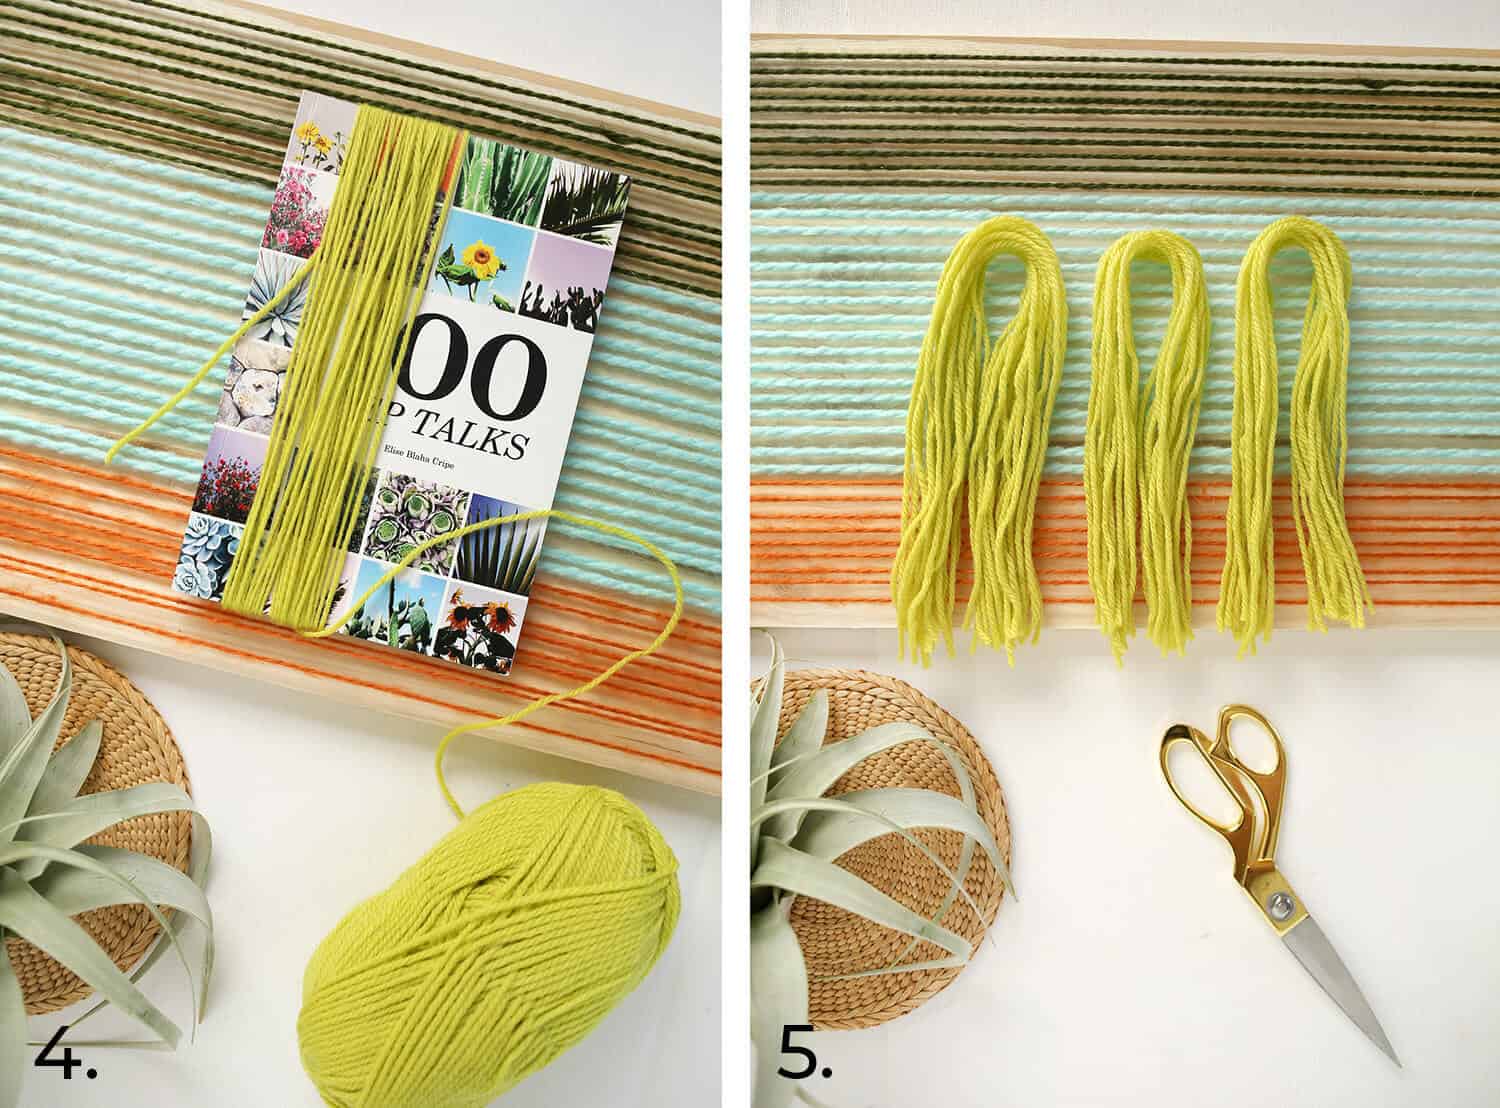 Step Four: An efficient way to create a lot of fringe in a short amount of time is to find a book or thick piece of cardboard that is roughly the length you’d like your fringe to reach. Then start wrapping it around and around and around.
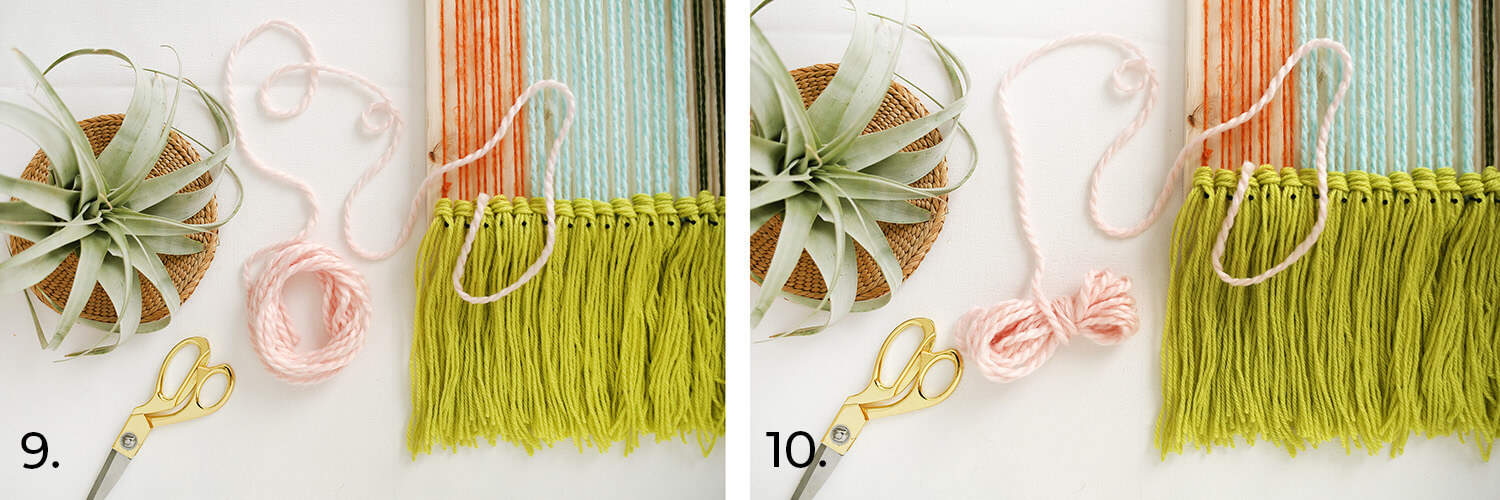
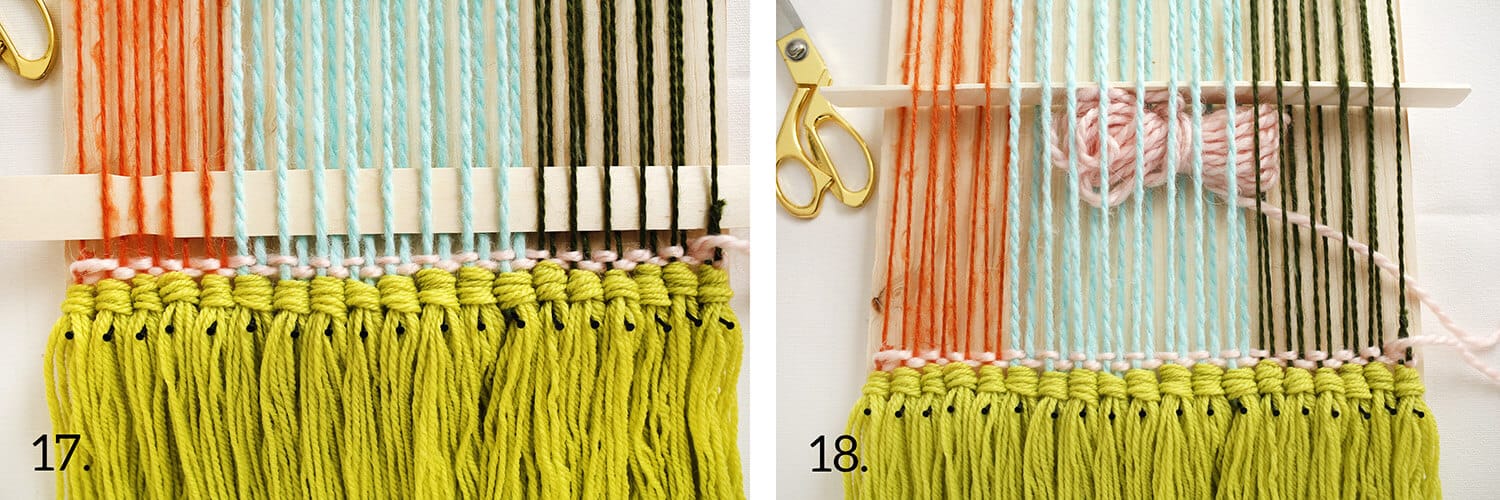
Step Five: Cut in one place only and then separate your yarn into equal strands. Not enough fringe? Start wrapping again until you’ve cut enough. 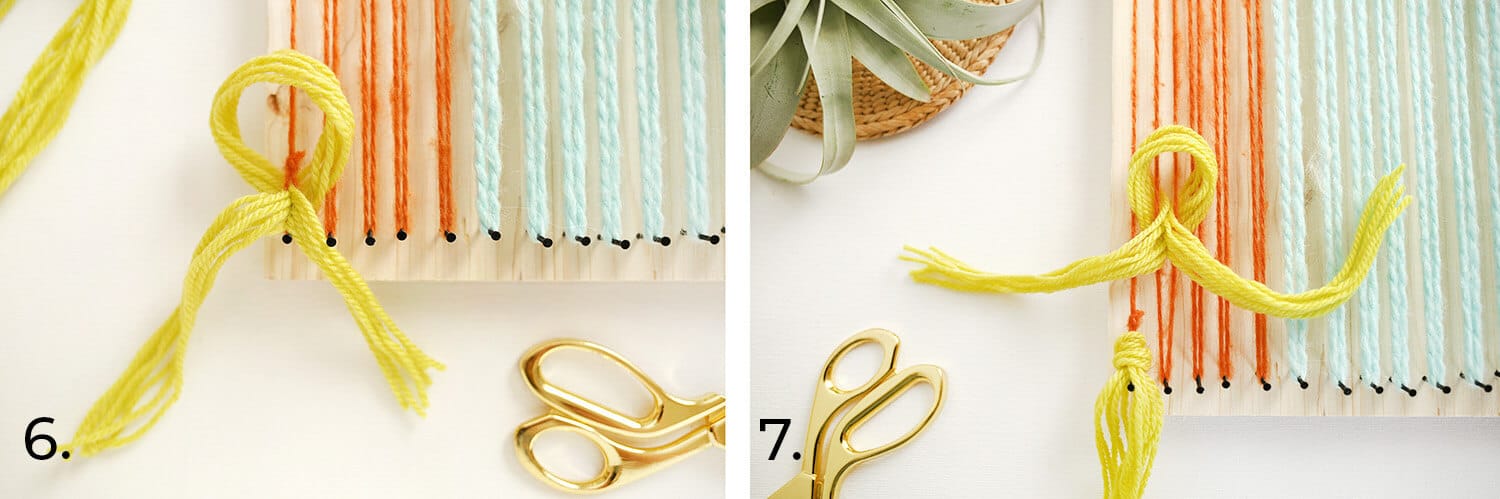 Step Six: For a chunky fringe at each end, you’ll want to use about seven strands of worsted weight (medium weight) yarn per tassel or about four strands of chunky yarn per tassel.
Place your loom on a table top or on the floor and start with the edge that has the looped knots where you started and finished your warp.
To create a rya knot, find the center of your first bunch of strands and place it on top of your loop knot. Wrap each side of the fringe around the outside of the loop knot and up through the center of the loop so that the two ends meet. Pull the ends up towards you so that they are mostly even. Smooth out the knot that it makes.
Step Seven: Move to the next nail and place the center of your bunch of strands on top of the two warp rows that loop around the nail. These are warp rows and a rya knot (your fringe) needs two warp rows to wrap around. Your loop knot acted as your two warp rows in step six. Wrap the two ends around the back of the warp rows and towards each other so that they come up through the center. Then gently pull the ends down and form a knot. 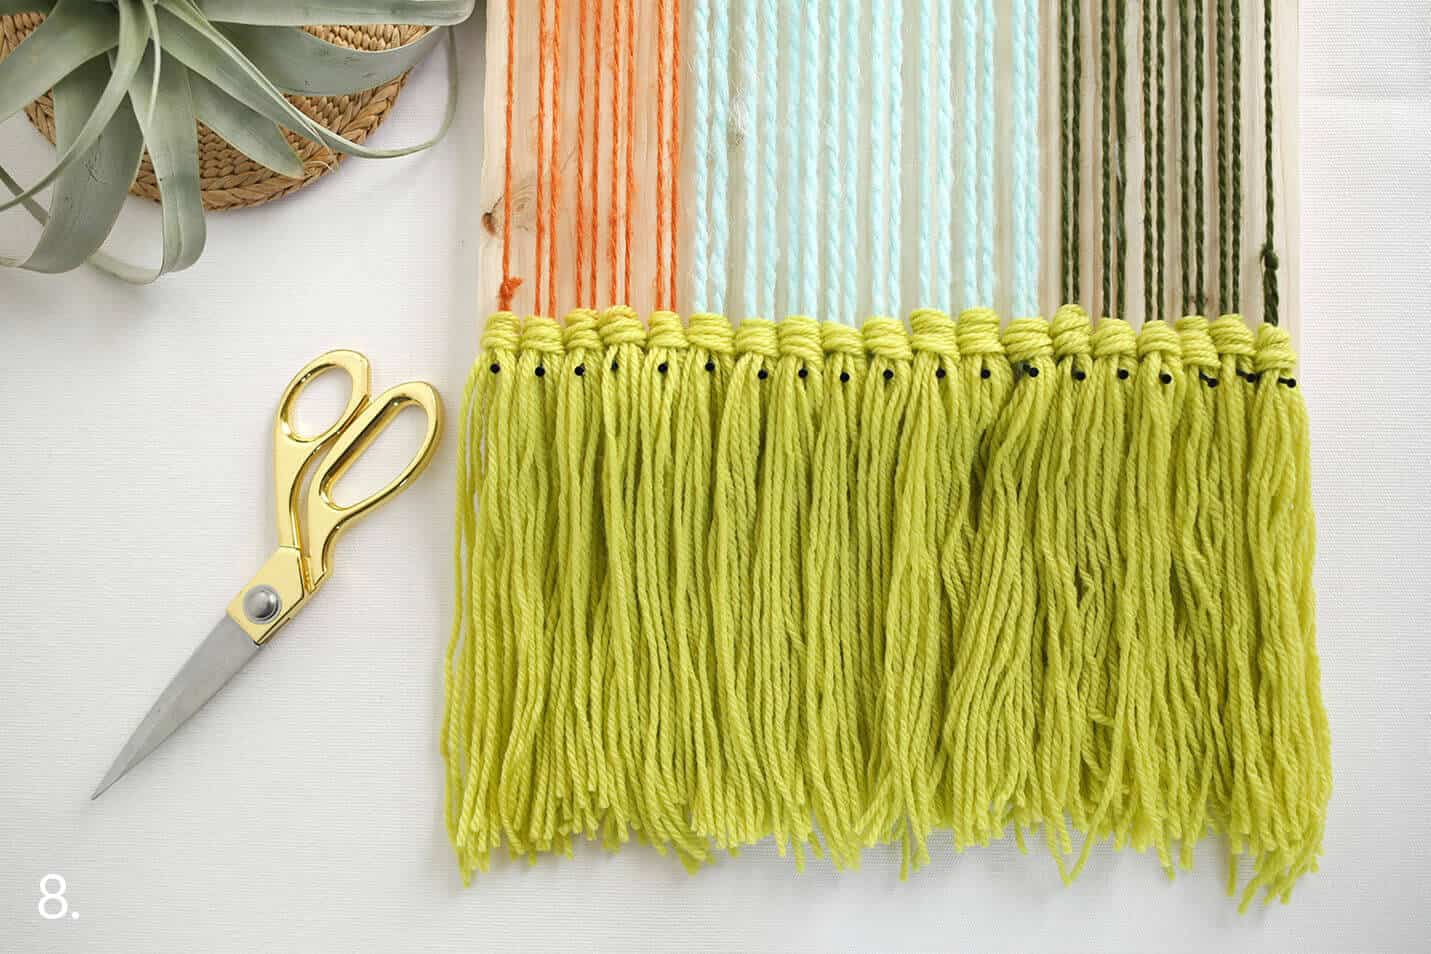 Step Eight: Continue this process all the way across, ending with the loop knot on the last nail.
 Step Nine: Instead of weaving with a needle or stick shuttle, you’ll be making a yarn butterfly. This allows you to work through a longer length of yarn and leaves you with fewer loose ends to hide. Cut about three yards of your first color block and wrap one end around your open hand until you only have about 30″ left on the loose end.
Step Ten: Then gently remove it from your hand and wrap your loose end around the circle of yarn about five times, so that it creates a little bow or butterfly shape. This yarn and all of the other strands that travel through the vertical warp rows are called the weft row.
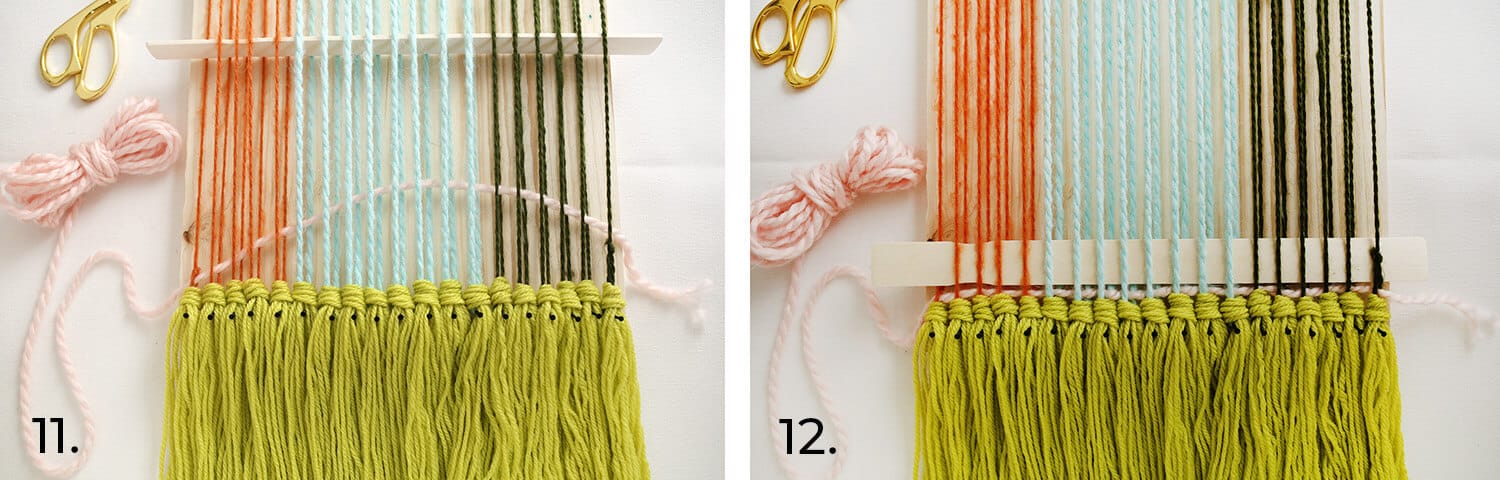 Step Eleven: When you weave your weft row through your warp row, you’ll go over and under, over and under until you’ve woven to the opposite side. Create a little arch to allow a little give as you push that weft row down. Push it down in the center so that it rests on top of the fringe and then push the rest down on either side of the center until it’s flat. Ignore my paint stick in the above photo.
Step Twelve: Weave your paint stick over and under the same warp rows as the weft row you just wove through. You want these to match so that you can use your paint stick or weaving sword to separate the warp rows and create a shed for you to quickly pass your butterfly through. This only works in one direction, though. Now that your weaving sword is in place, you can slide it up about twelve inches to have it out of the way so that you can weave in the opposite direction. 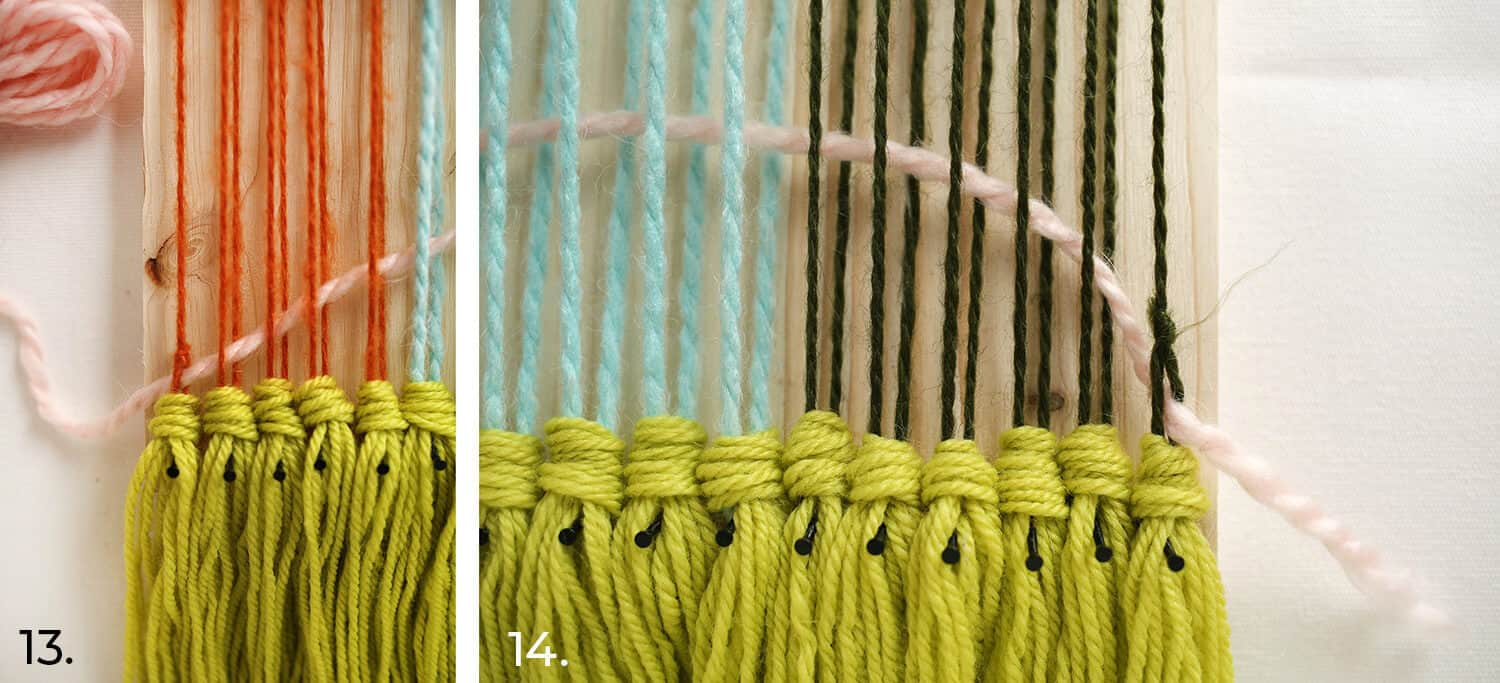 Step Thirteen: Usually you’ll lead with the butterfly bundle since it gives you something substantial to pass through the warp rows. However, use your loose end to weave that first weft row so that it can be woven through the loop knots on each end. This is necessary in this first weft row to ensure those single warp rows don’t slide off and unravel your scarf.
Step Fourteen: Be sure to always leave a three inch tail so that you have something long enough to tuck in later. 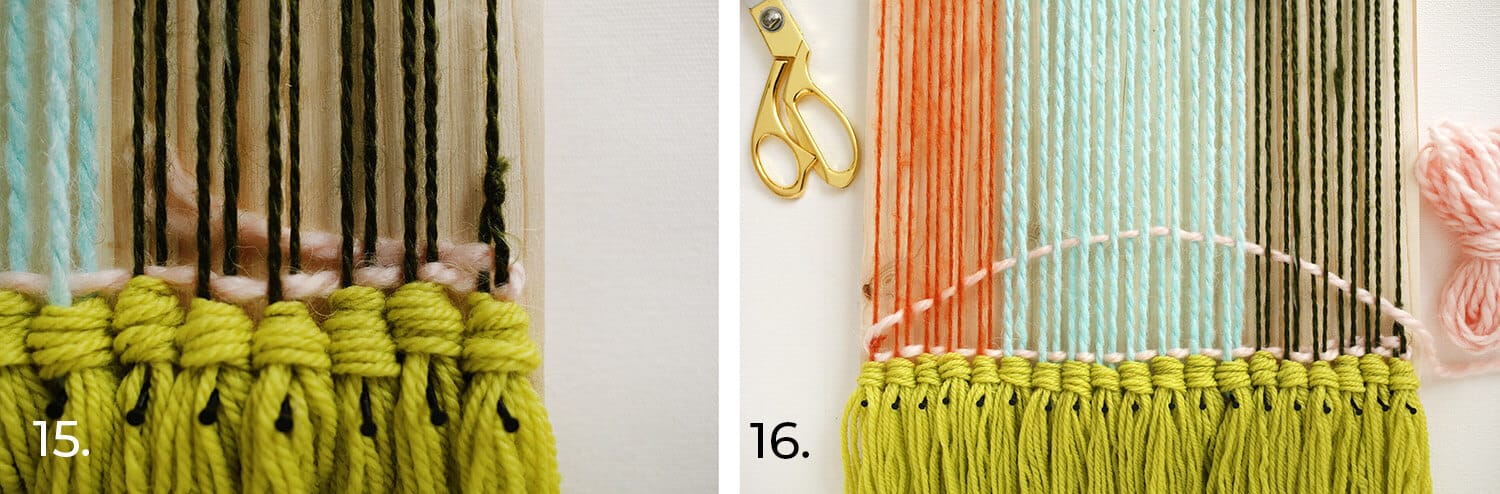 Step Fifteen: Weave that tail end in by wrapping it around the outer loop knot row and back through the center of the loop knot. Then tuck the tail end back behind the warp rows. This gives you a clean edge and will be hidden later.
Step Sixteen: Using your butterfly bundle, weave your second weft row by wrapping around the outer warp row and then weaving the opposite under and over pattern as the first weft row. Create that arch to avoid the hourglass effect and be sure to give your weft yarn just a little extra room on those edges. You won’t be able to use your weaving sword in this direction.
Step Seventeen: If you ever forget which direction your weaving sword works in, just pull it down to check. If it opens up space and your last weft row can move around, that’s the direction you want to use it. If it locks your last weft row in, that’s not the direction. You can also use your weaving sword to help even out your weft row as you bat it down to rest gently on top of the weft row underneath. With this chunky yarn, you should be able to see the contrasting patterns of your warp through your weft.
Step Eighteen: Raise your weaving sword for that third row and slide your butterfly right through that open shed. Continue weaving back and forth until you run out of yarn in your butterfly. 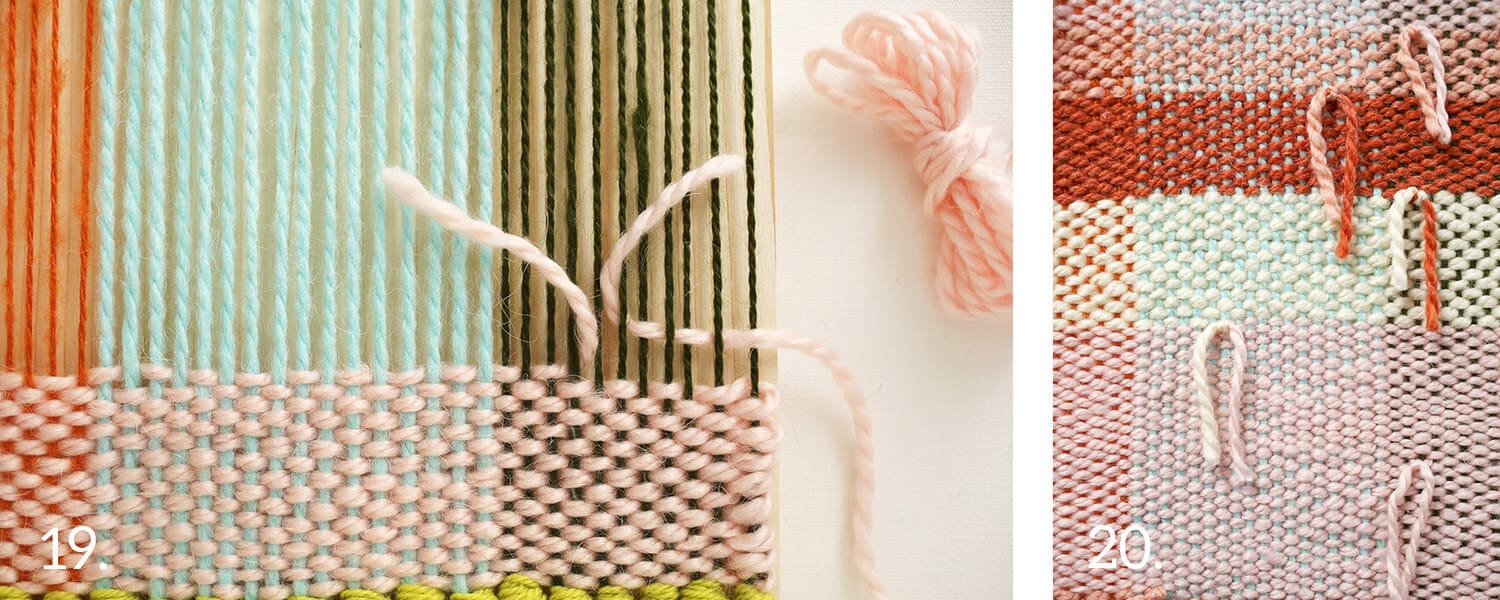 Step Nineteen: I usually prefer to tuck my tail ends to the back of a weave, but we need them on the front side today. Make sure you have about three inches to work with and be sure not to end too closely to the edge. You’ll either pick up where you left off with another bundle of the same yarn or you can switch to the next color block. Just be sure you leave another three-inch tail at the beginning.
Step Twenty: These loose tails should be tied together to form a double knot. They’ll also be where you eventually add more tassels, so keep that in mind. Do you want all of your tassels to be on one side or spread out in groups of three? Alternate the height of your color blocks to keep the eye moving and be sure to step back every now and then to make sure you can see the bigger picture. 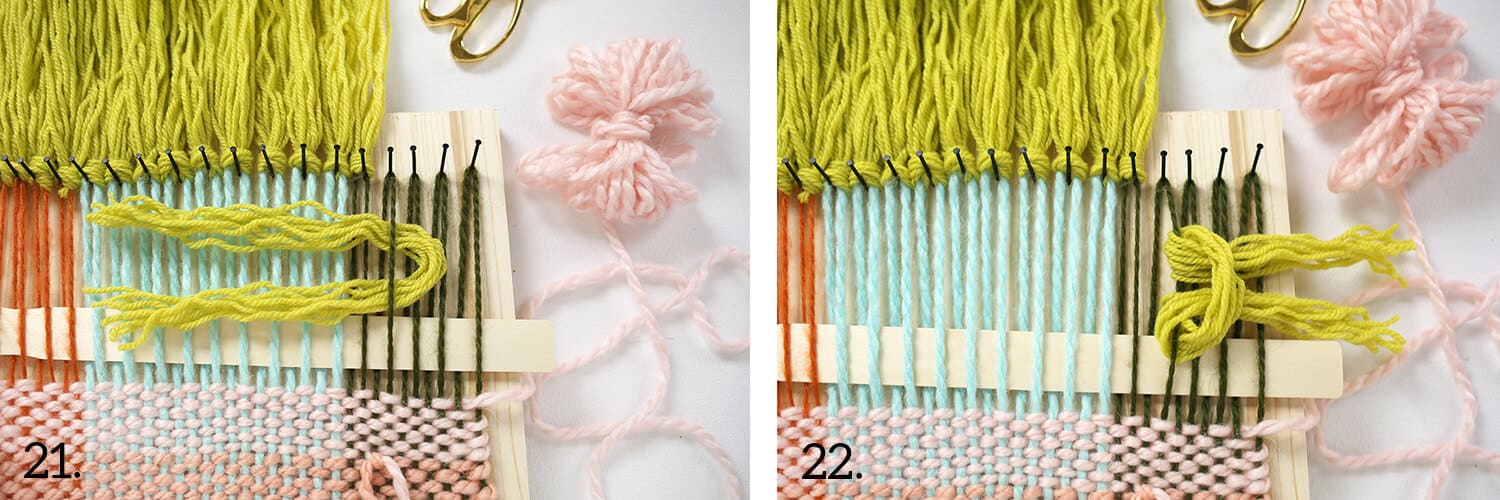 Step Twenty-One: You’re almost done! Once you’ve woven to within six inches of the opposite end, repeat the process of adding more tassels while you can. Another easy way to add rya knots on a loom with nail heads is to place the center of the tassels underneath one of the two in each pair of warp rows.
Step Twenty-Two: Then pull the two ends up and through that loop as shown. 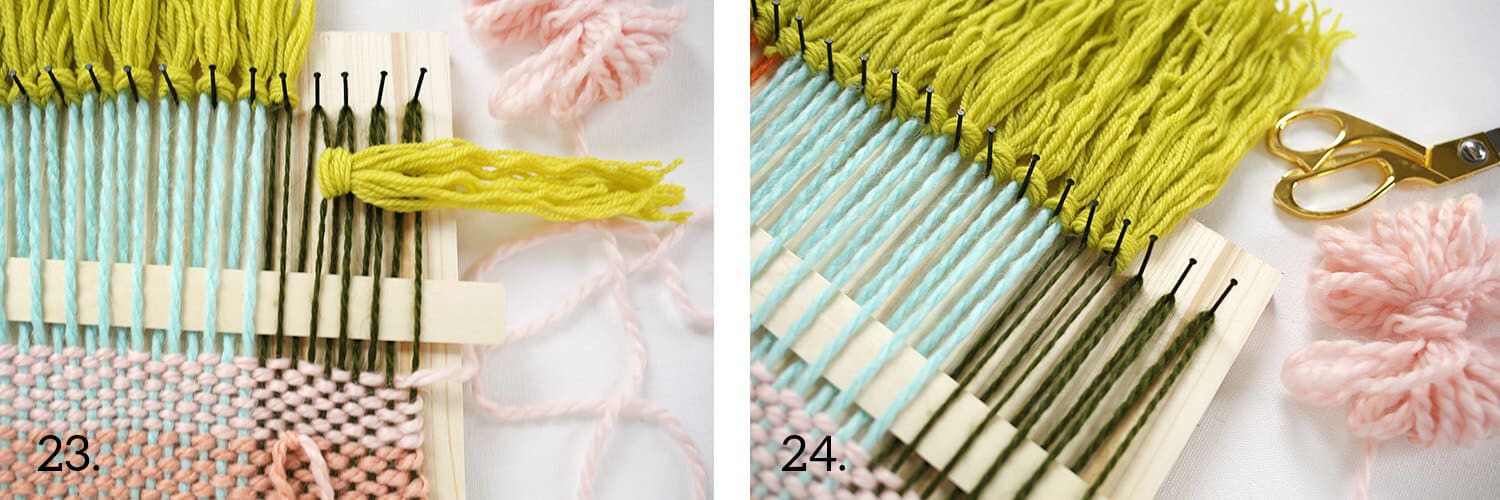 Step Twenty-Three: Gently pull your ends together.
Step Twenty-Four: Then slide the knot down and pull it underneath (above) the nail head. 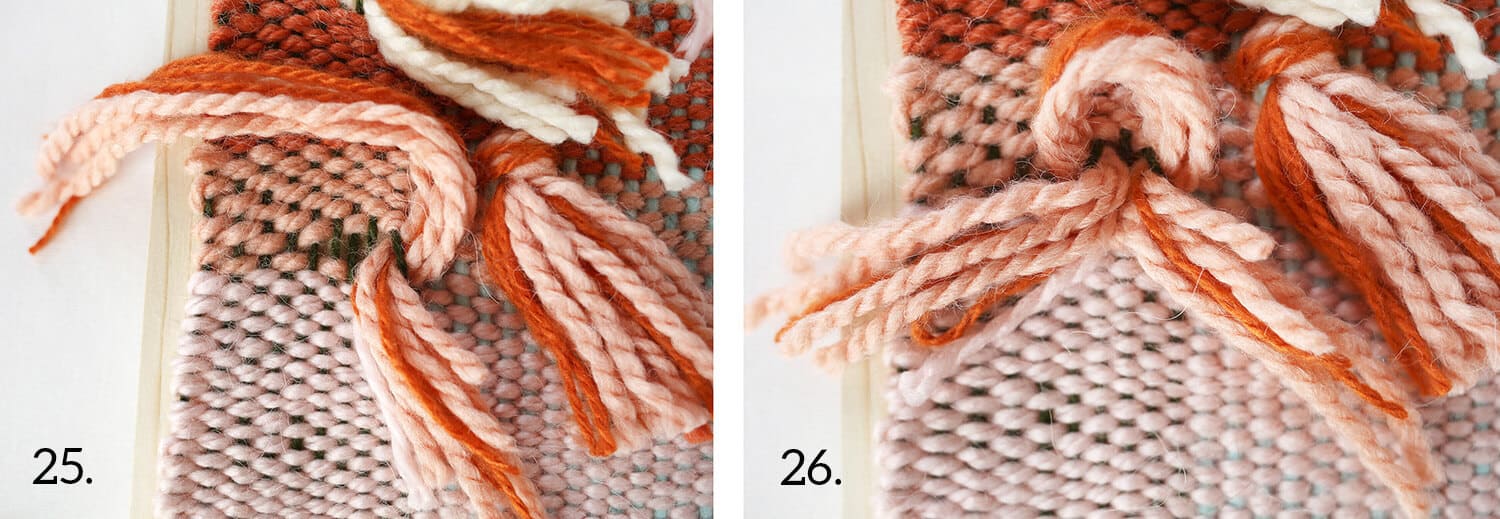 Step Twenty-Five: To create chunky tassels, cut six or seven strands of the two yarn colors that are meeting up. Find the two warp rows closest to the tail ends that you tied together in a double knot. Gently push the weft rows up and out of the way and create a rya knot just like the fringe on each end, but with the first method. Center the bunch and then wrap one end behind and around one warp row.
Step Twenty-Six: Then wrap the other end behind and around the warp row next to it. You can also skip a warp row, but not skipping makes for a cleaner back side.
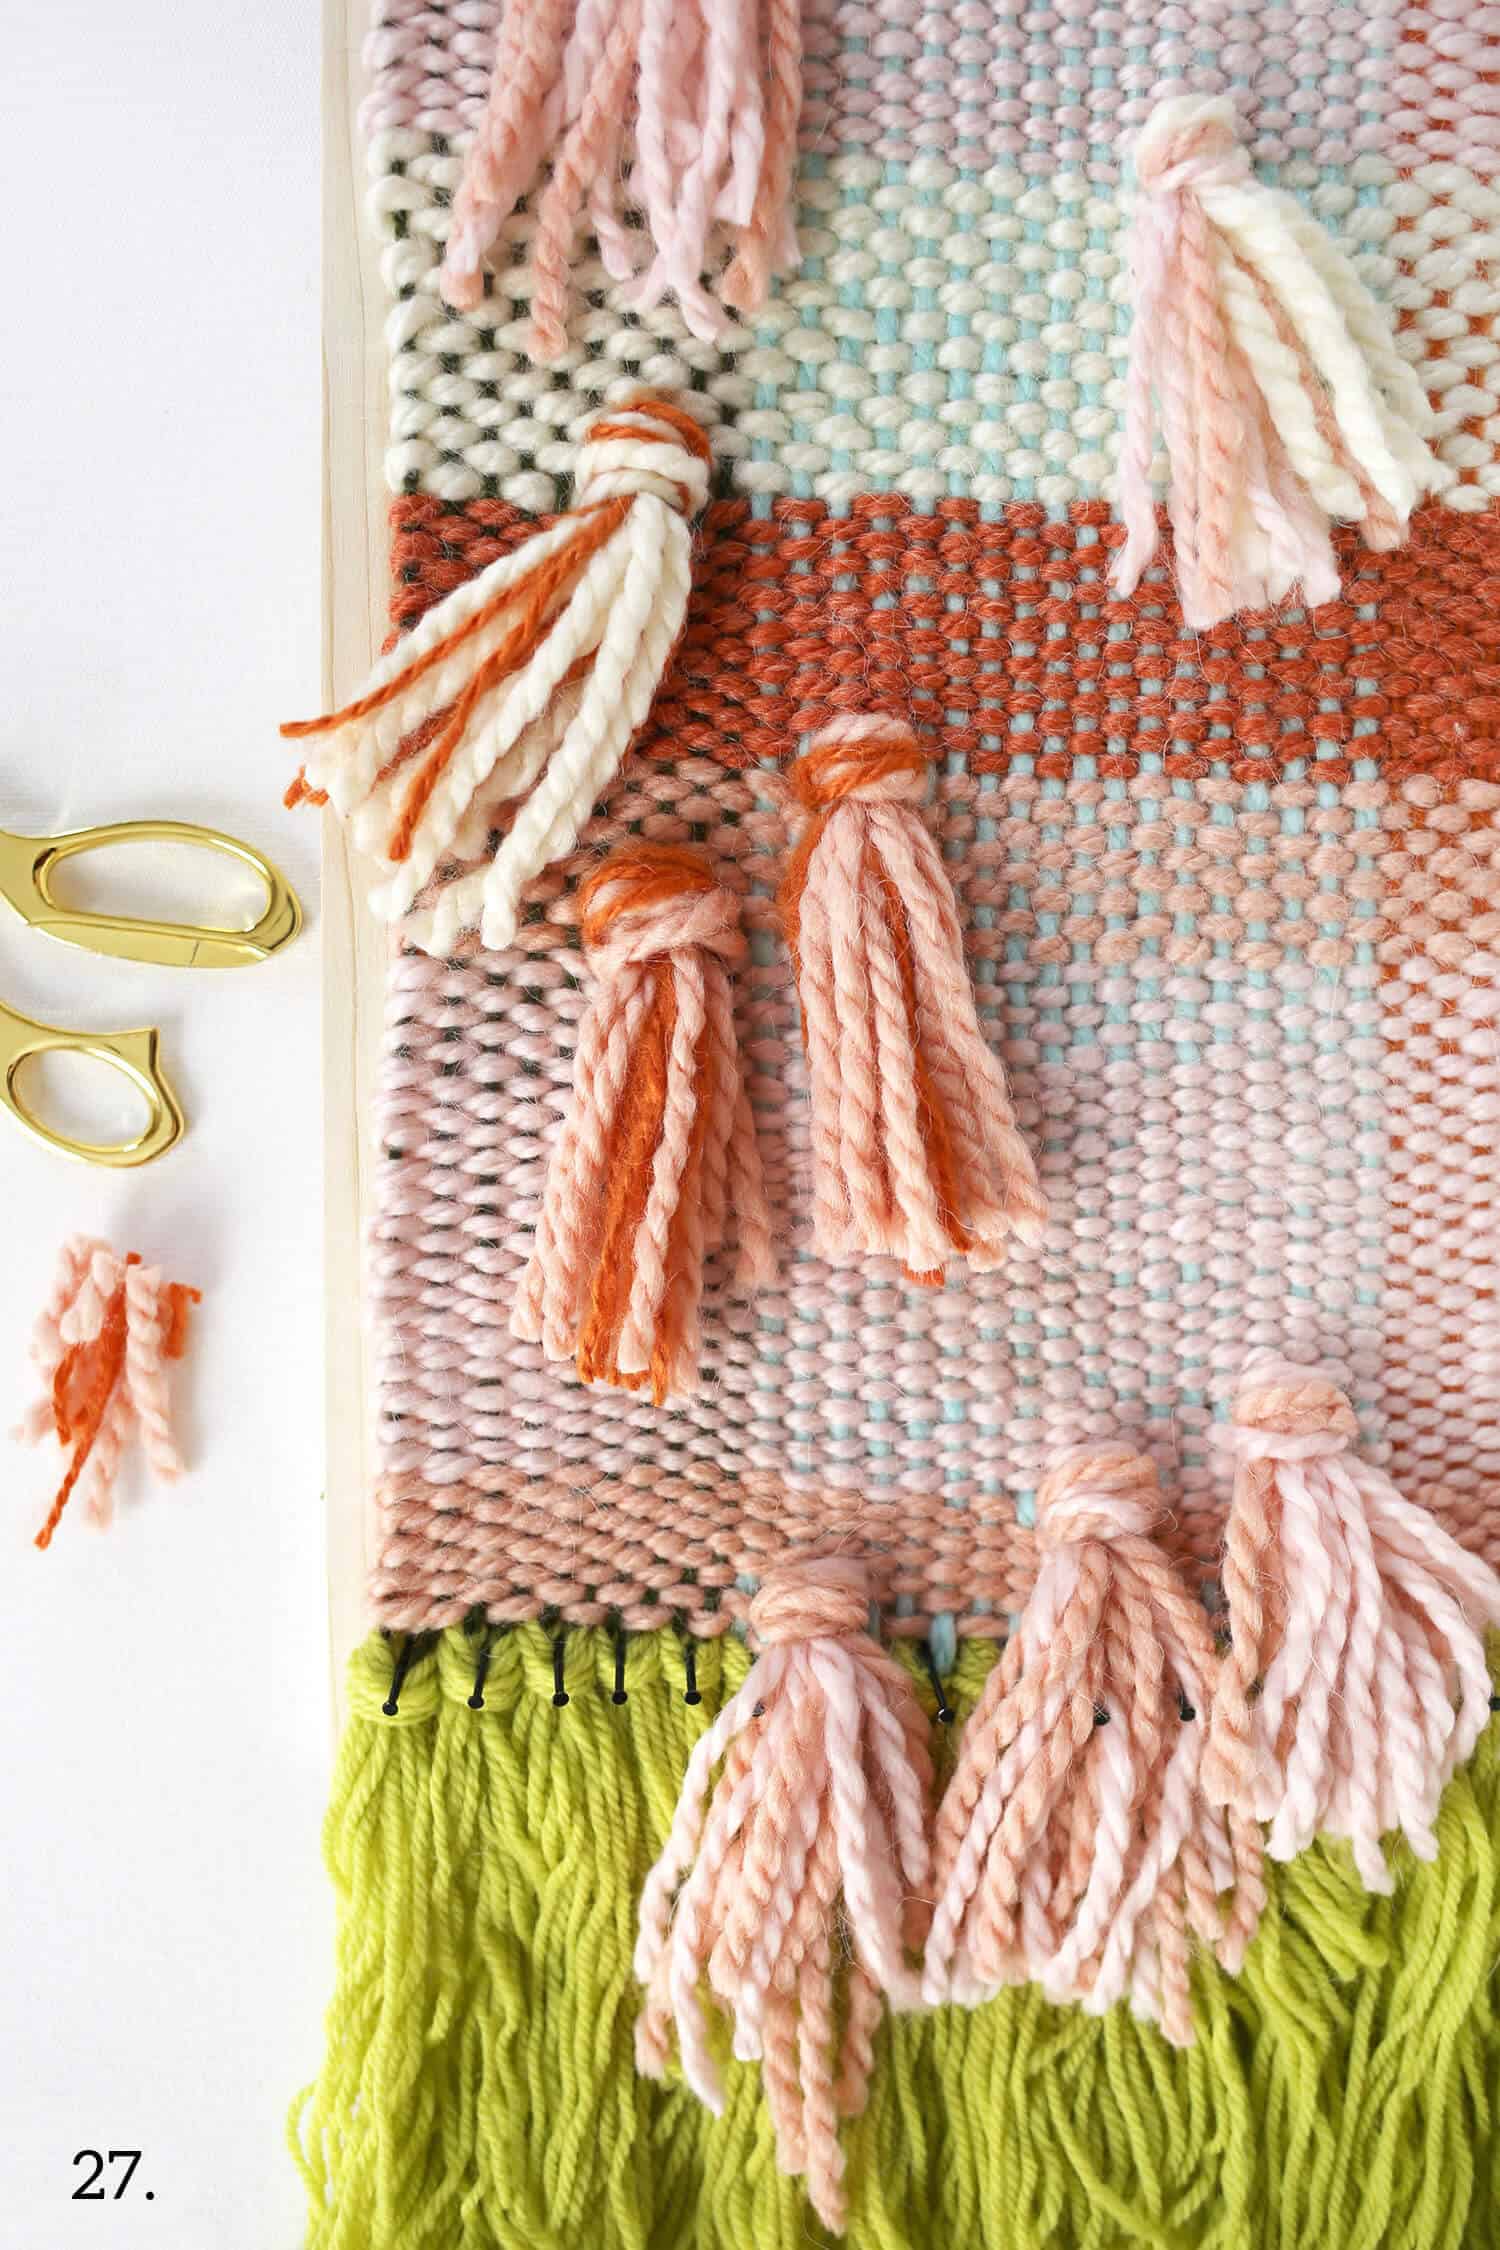 Step Twenty-Seven: Continue adding your tassels until you’ve hidden all of the tail ends. Then trim them up for a more finished look. Take this time to brush out your fringe on each end with your fingers and trim those so that they’re mostly even as well.
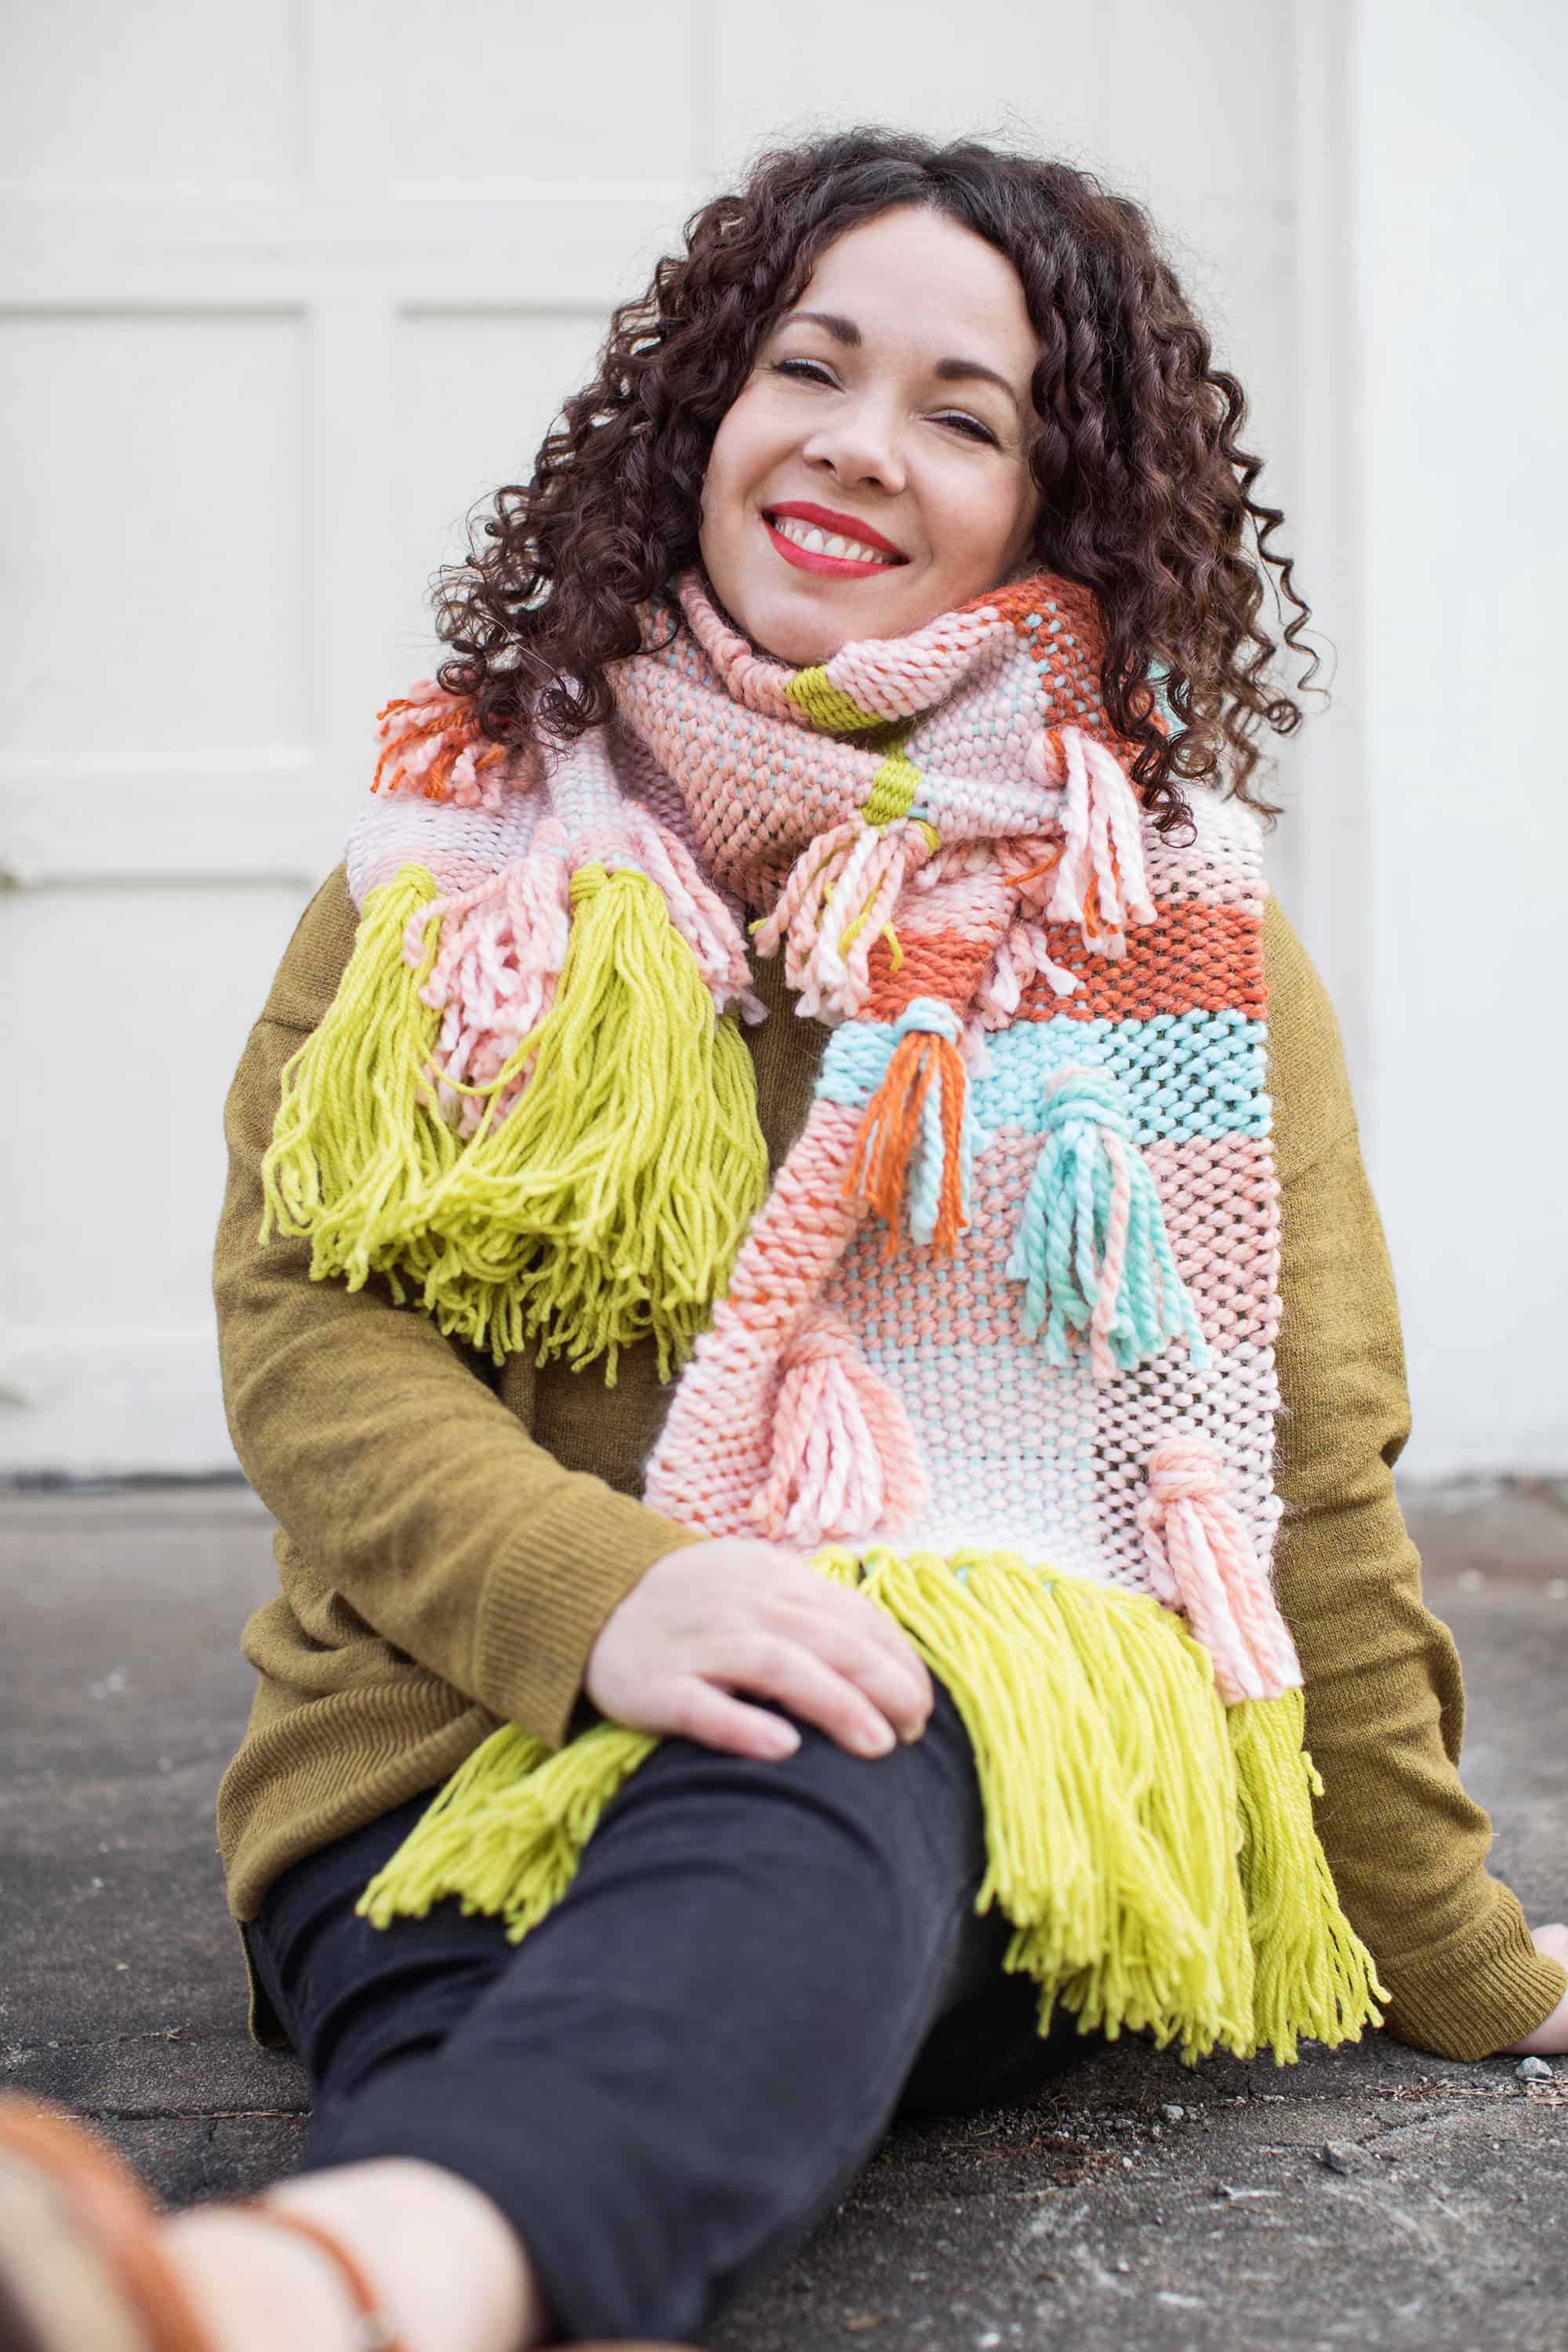 If you’re in SoCal or anywhere in the Southwest, you may only get to wear your oversized statement scarf for like one week out of the year, so make it count! Or start praying for a cold snap. Ha!
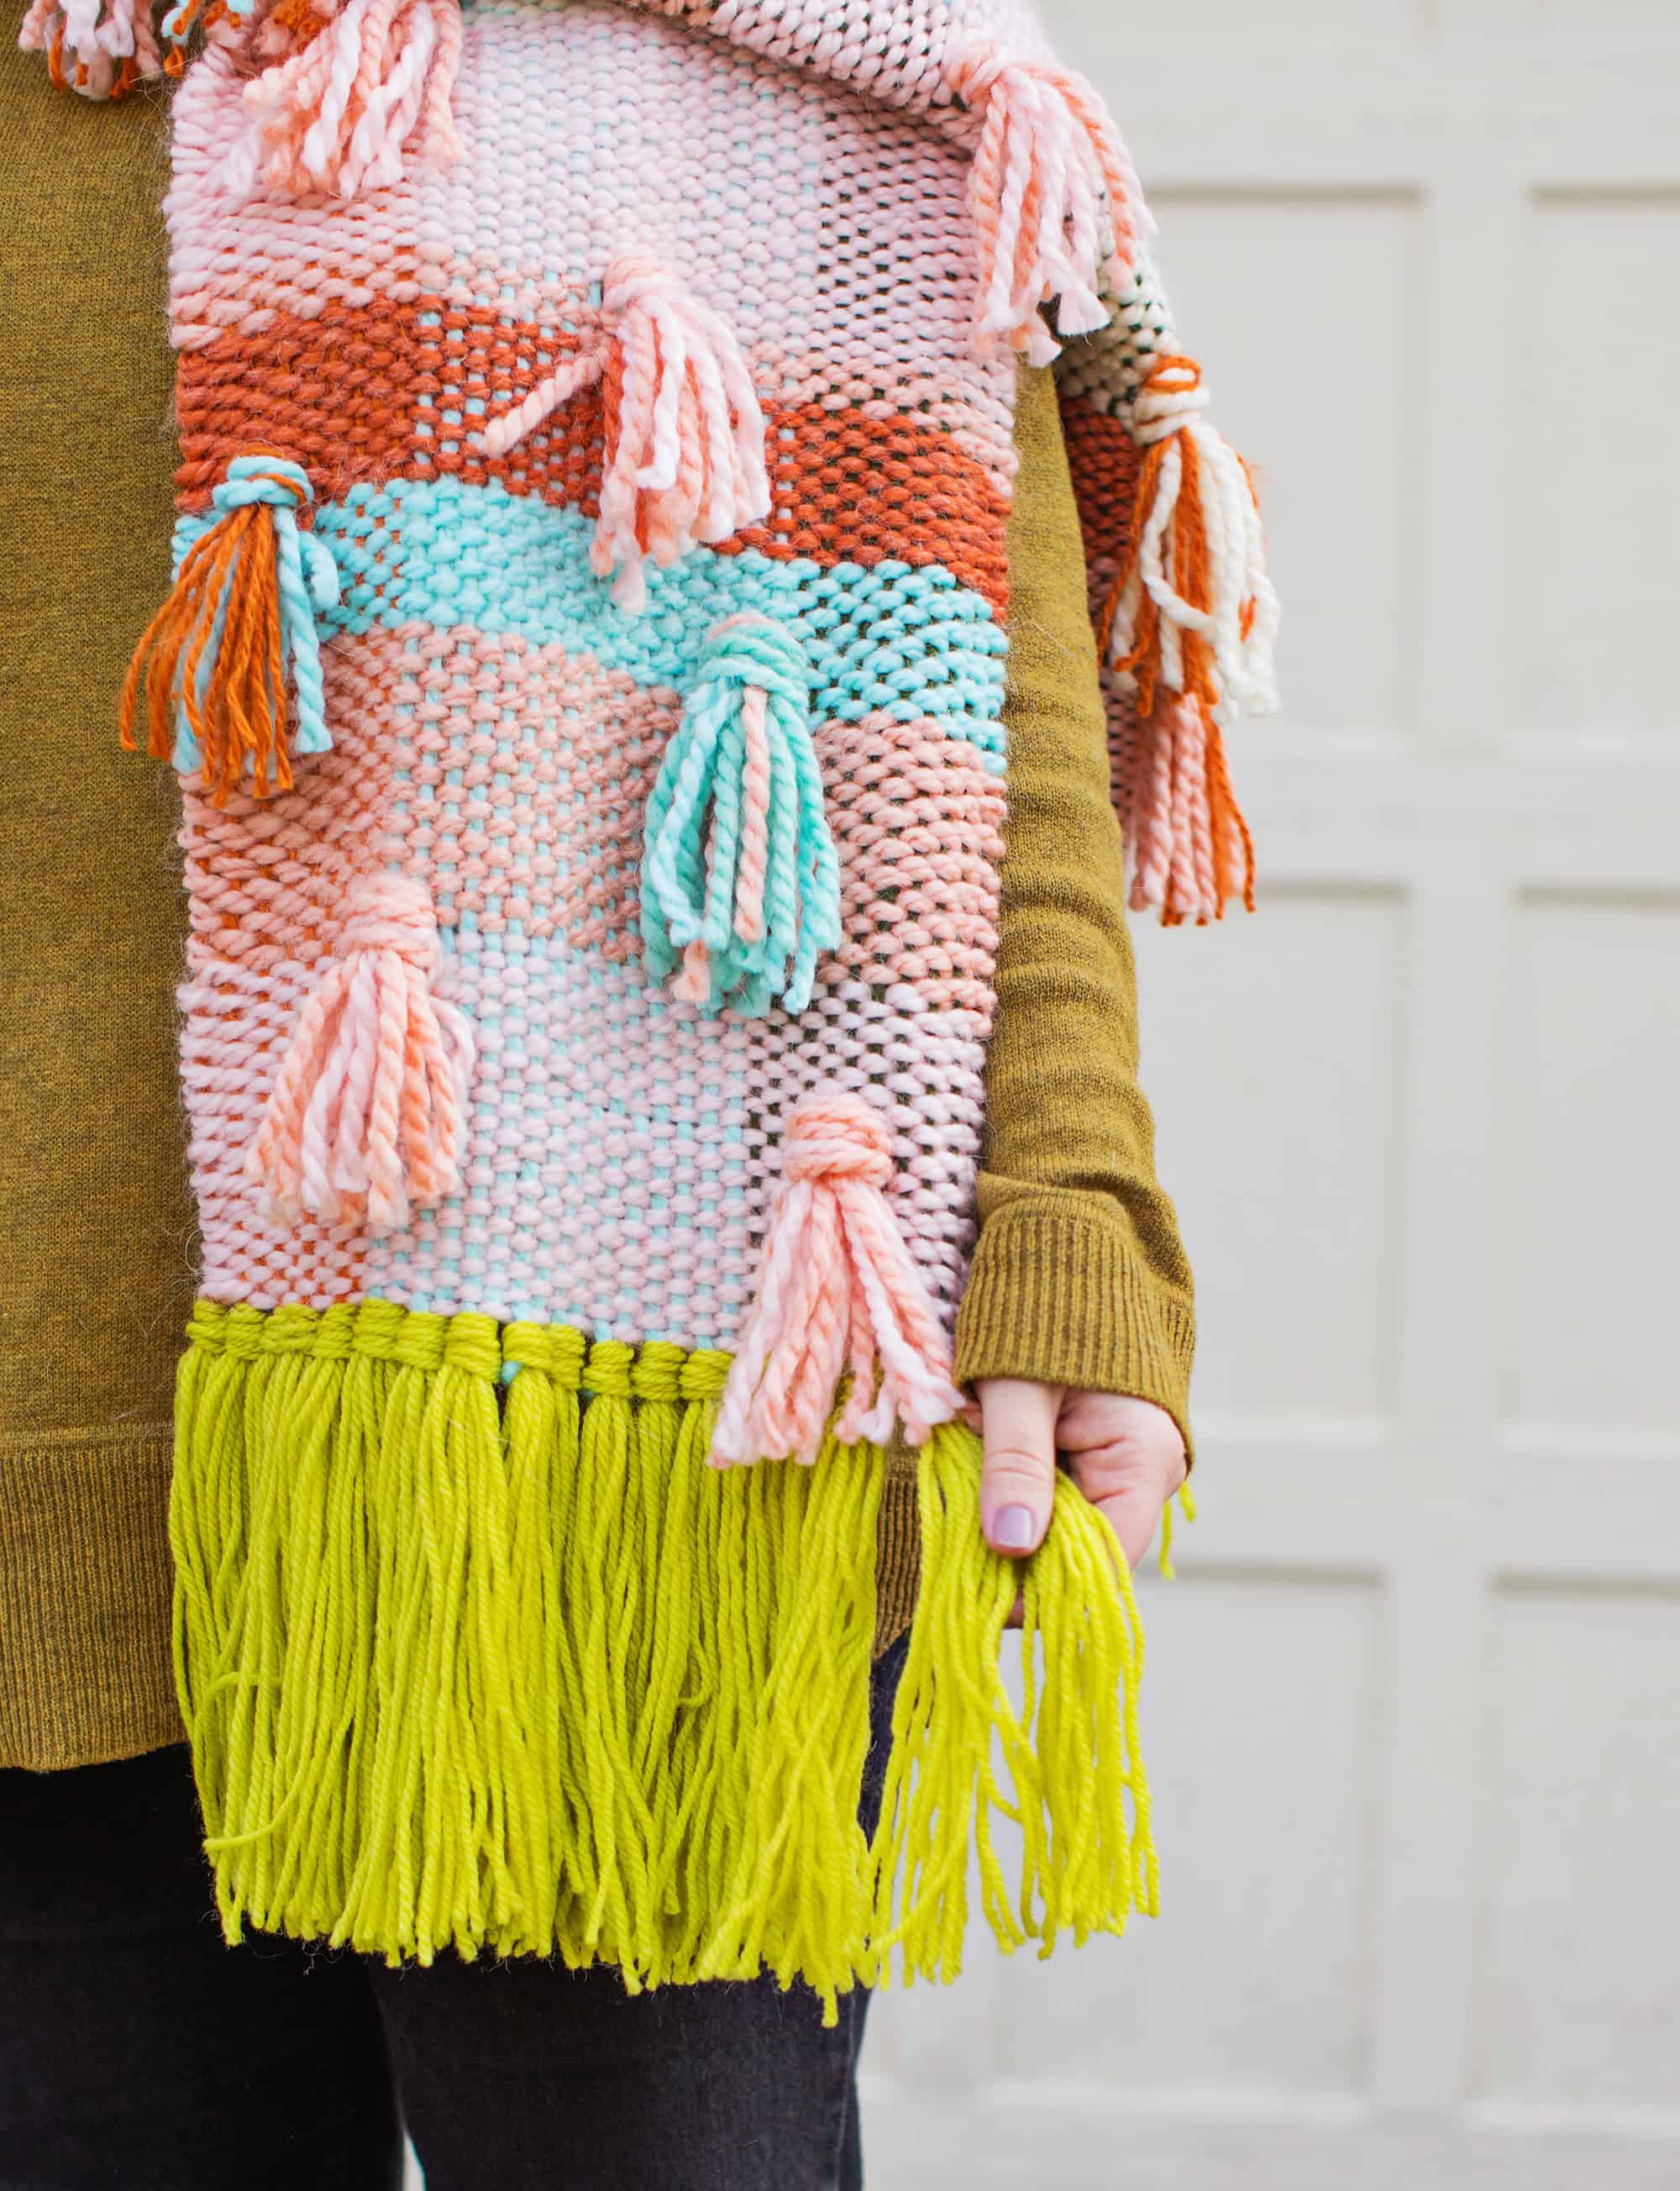 The yarns I used for my scarf are wool blends and alpaca blends so they are soft and warm but also feel better than acrylics would. This scarf can be hand washed and hung to dry if it gets soiled and will likely hold up well due to its construction.
If you love the idea of weaving something wearable but don’t want to feel swallowed whole, create a loom that is narrower and adjust your colors accordingly. You can swap out the tassels for pom-poms or you can stitch the tail ends up through the weft rows to hide them and achieve a more minimalist look.
I am especially eager to see your finished woven scarves, so be sure to tag @abeautifulmess on Instagram. Stay cozy, friends! – Rachel
Thank you so much for this very thorough tutorial! Someone gave me a beautiful cherry wood loom. She no longer wanted it. But she lost the instructions. This should certainly work for a good substitute. I CANNOT wait to make something on it now!
Man, this is cool! I keep seeing neat woven wall hangings that just wouldn’t work for us (we live in Hawaii so the windows are always open and absolutely everything gets covered in dust and volcanic grime, which would ruin a woven wall hanging pretty quickly), but I love the bright, hand woven look. Thanks for creating a project that I could actually make and use!
Hooray! I was just thinking this project might not work for those that live in a warm climate but maybe it’s still necessary a few weeks out of the year-even in Hawaii! So glad you love it.
This is so cool! Such a fun idea, and I love the colours!! x
This scarf is adorable!
Paige
http://thehappyflammily.com
Magnificent scarf! I love the colorwork and the tassels! They add that extra touch of whimsy!
Wow, this is amazing! The colors together are beautiful and I love the texture the tassels give it.
Kayla | Charcoal + Silk
Kayla,
Tassels on everything!!!
Ooh, this is beautiful. I love the color scheme!!
Thanks, Ana!
A woven scarf is a great idea and with your instructions I should really be able to produce also such a wonderful scarf 🙂
xx from Bavaria/Germany, Rena
www.dressedwithsoul.com
Perfect for the freezing weather right now, too! The scarf would make a lovely gift for a girlfriend or a family member. Thanks for sharing! 🙂
Charmaine Ng | Architecture & Lifestyle Blog
http://charmainenyw.com